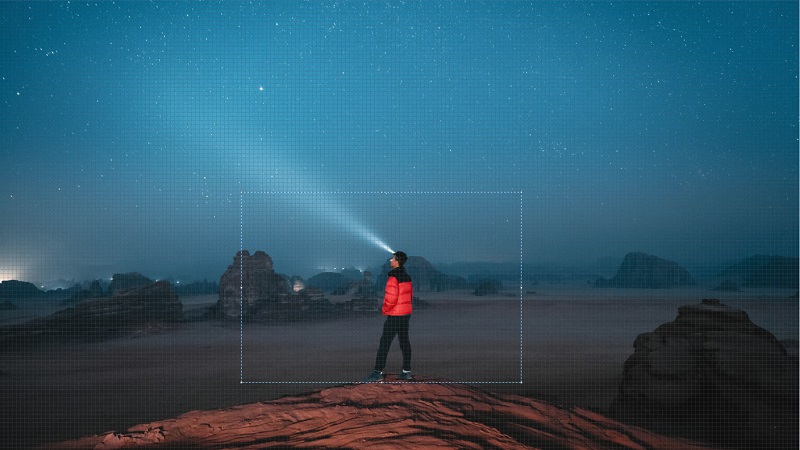
Cropping is one of the easiest and the basic tools to enhance your photographs. It is not only about removing certain parts of your images. It is about giving a new look and dimension to your photos by eliminating all the blemishes and imperfections. Therefore, we are going to explain what cropping in photography is and how to use it to create beautiful photos.
There are many different ways to use cropping. Some social media platforms automatically crop your images when you upload them. Similarly, you can be as creative as you want while image cropping. For example, you can crop your image into a circle or a square. Simply put, you crop your image whenever you ‘cut’ it.
What is Cropping in Photography?
Cropping occurs when you cut one or more edges of a photograph. It reduces the same number of pixels from the width that you reduce from the length and vice versa. However, it is only true when you lock the image aspect ratio.
Cropping from only one side requires you to unlock the aspect ratio. It will also change the proportion between length and width which sometimes results in skewed photos.
One of the simplest image cropping tools is the crop tool Microsoft Paint. All you have to do to crop an image is to select the Crop Tool and then select the part of the image you want to crop. The image will only retain the area within the Crop tool while the rest is removed.
Cropping is perhaps the simplest yet greatest wonders of modern photography, even better than tools like color saturation, contrast, exposure, color conversion, and adding and removing elements. All these require a bit of advanced knowledge of tools like Photoshop and Lightroom.
Cropping, on the other hand, is straightforward yet it can affect your photos powerfully. A humble crop tool can sometimes totally transform a dull picture.
Photo Resizing and Cropping
Before we learn the crop tool techniques or art of cropping, it is important to discuss your cropping goals. You need to understand the math of cropping as well. The sensors of most modern digital cameras and mobiles range between 16-24 megapixels and 12 megapixels respectively. Some high-end mirrorless and digital cameras have somewhere from 36-45 megapixel sensors. However, 20 megapixels can be considered a standard resolution and thus we are going to use it today.
Cropping for Online Images
Millions of images are uploaded and shared online every day. The best photo size for online images is 2048 megapixels either for width or length. Anything more or less will have a negative effect on the image. It means you can remove 80% of the pixels (16 million) offered by a 20-megapixel camera. Still, it delivers extremely sharp photos for sharing online. However, this is not a hard and fast rule. Some sites require you to upload larger images. But – 2048 pixels is the standard image size for popular websites like Facebook, Flickr, Instagram, etc.
Cropping for Print
For printing, we deal with dots per inch or dpi instead of pixels. 200 dpi is the ideal printing size. It means you can create a pretty sharp image with the dimensions of 27 inches from an uncropped image taken by a 20-megapixel camera.
Images will be even crispier if you are going for a standard 4×6” size. There will be 1 million pixels in the image of this size. It is roughly equal to 5% of the total pixels delivered by a 20-megapixel camera. In simple words, you can crop the image as creatively as possible or to your heart’s content if you restrict yourself to these sizes.
How to Crop an Image?
When it comes to types of cropping in photography, you can do whatever you want. No photography cropping rule can guarantee perfection every time. You have to keep on experimenting until you get the best result.
However, you can follow some general tips and guidelines to enhance your photos on most occasions.
Reframe the Subject through Cropping
Framing and cropping in photography go hand in hand. You can put the spotlight on your subject or portray it more compellingly simply by cropping the image. Most people put the subject in the center of the image. However, it does not always yield the desired results that is to create a beautiful image.
You can crop an image from different sides to make it more pleasing and captivating. For example, you can remove extra space that distracts the viewers from one side to put more emphasis on the subject as in the case of the following image.
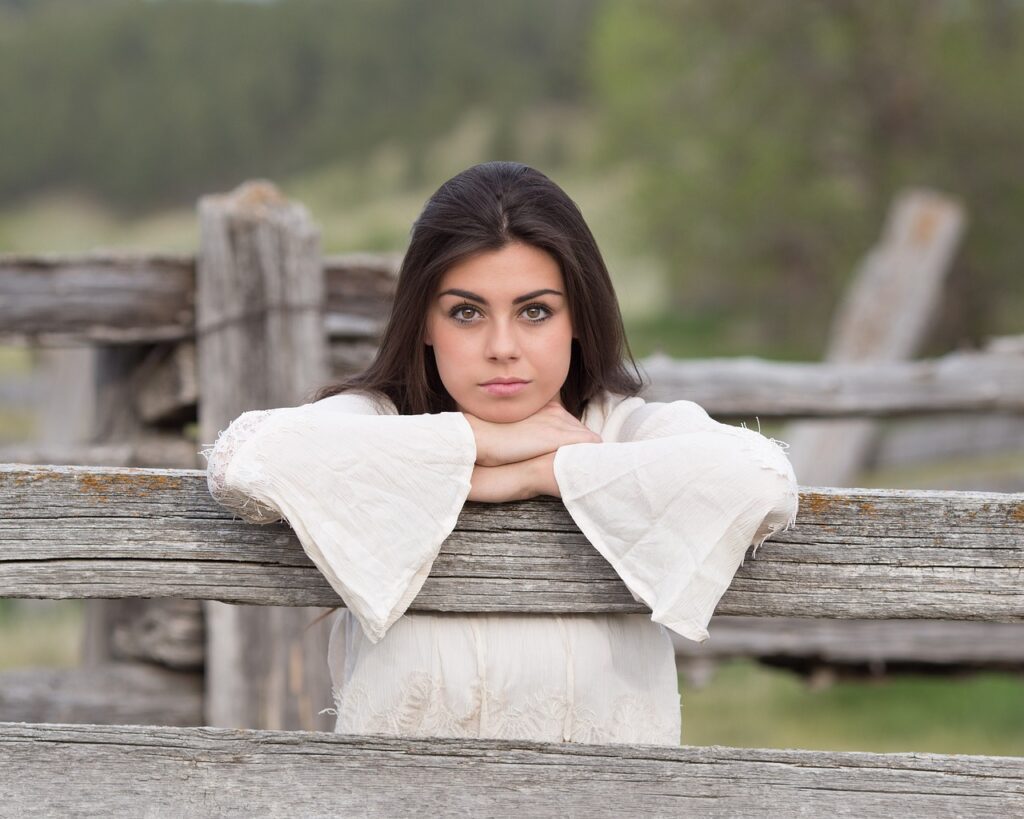
The girl in the image above is in the center of the frame. It is a decent image but it still needs a lot of improvement. There is plenty of extra and boring space on both the left and right of the girl. It is quite distracting and distances viewers from the girl.
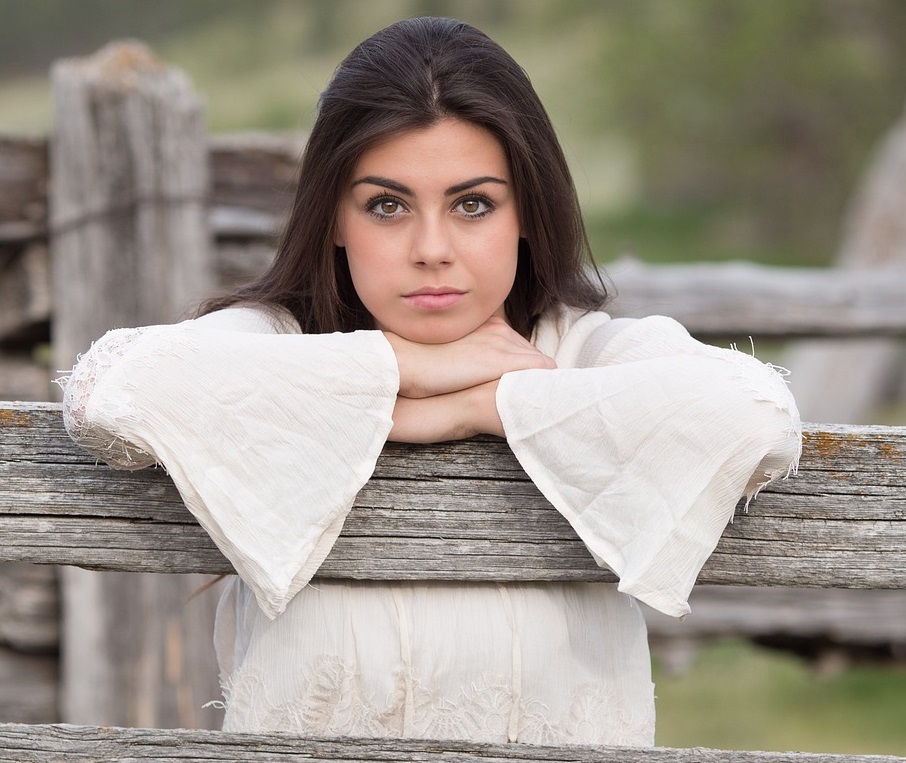
The cropped image below totally changes the emotional aspect of the image. It removes the extra space, highlighting the girl even better.
Rule of Thirds Cropping
You can further improve your images using cropping in the post processing. Just with any other technique, you can also use the rule of thirds for cropping as well.
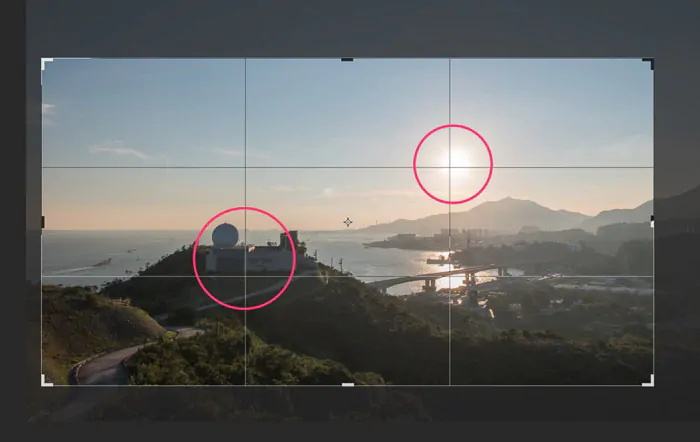
Toole like Photoshop and Lightroom remove the guess work from cropping. They display four lines by default when you click the cropping tool. These lines divide your images into three parts both vertically and horizontally. Now, you can put the subject on one of the intersections of these lines to create a pleasing and beautiful image.
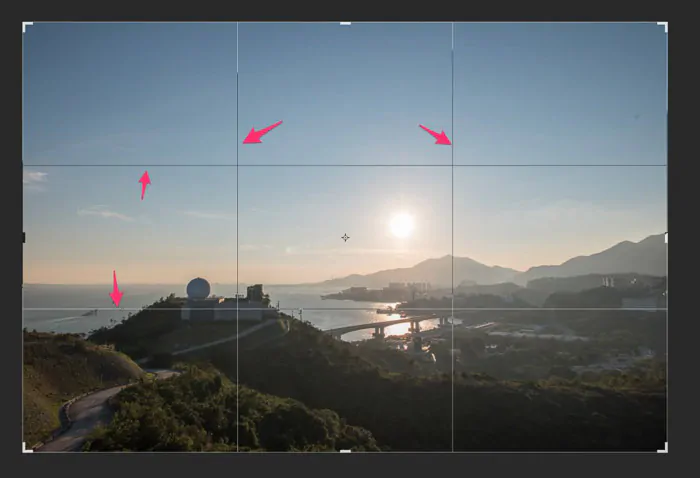
Another advanced cropping for composition technique is to place two different subjects on diagonal intersections. The two objects will become more prominent, creating a perfectly balanced image.
Leading Lines and Cropping
Leading lines are a very common concept in photography. Sometimes, you cannot perfectly compose your image when you take it. You need not worry because you can achieve maximum visual impact simply by cropping it to your liking.
The following is a picture of an apple. It is a very simple picture and nothing much is happening. However, you can bring the best out of this image just by cropping. You can benefit from the fact that it has a leading line which can catch the viewers’ attention.
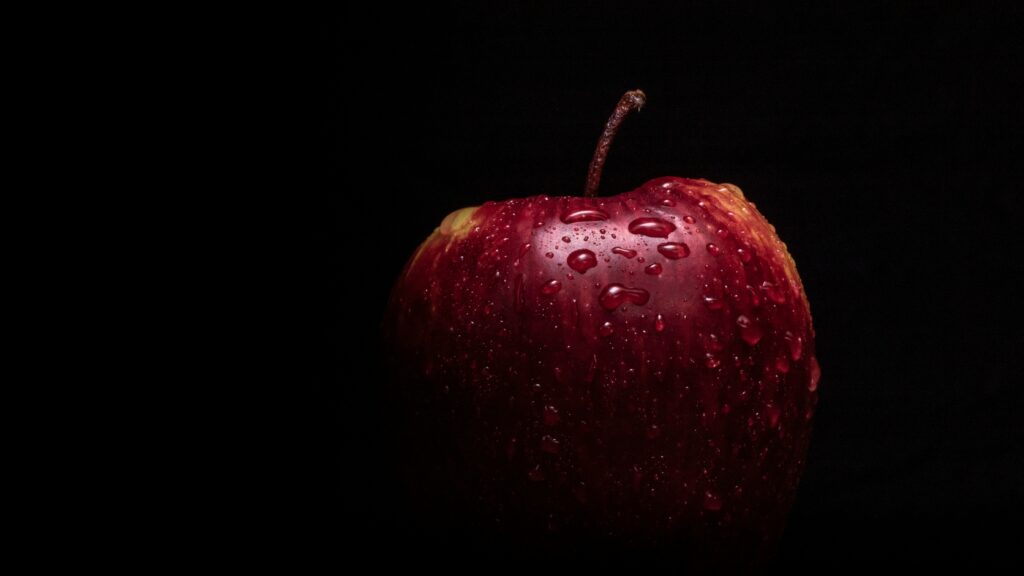
However, you need to use this technique carefully. Cropping the apple to the left leaves the image quaking and viewers uncomfortable. It is because the leading line is slightly going from the top right to the bottom left. In this case, there is too much space to the right which does not have any real impact.
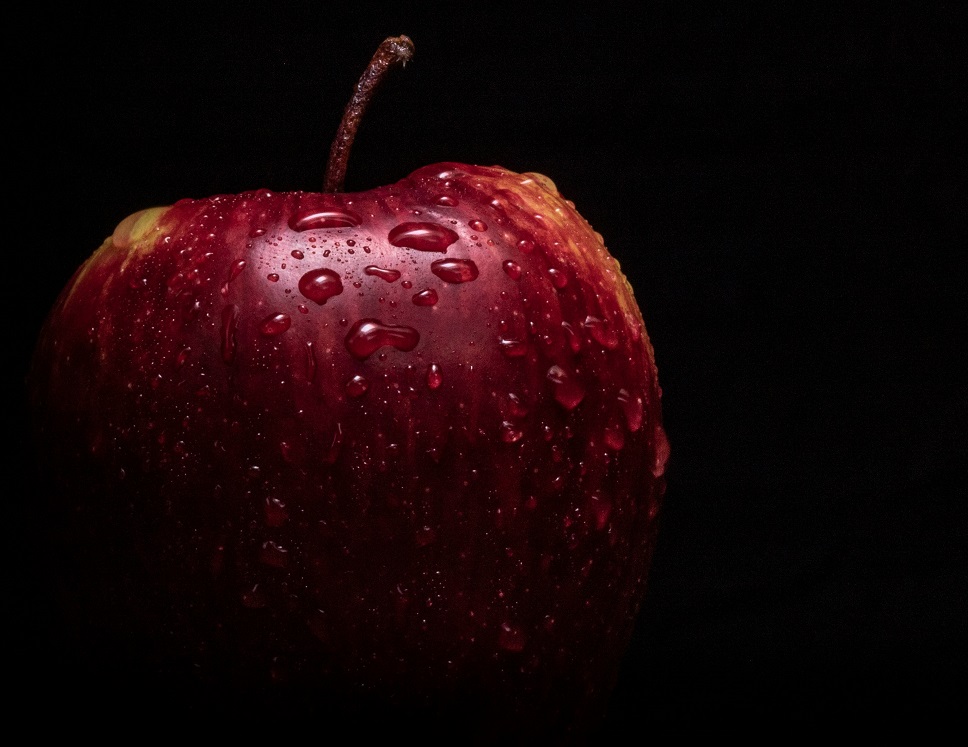
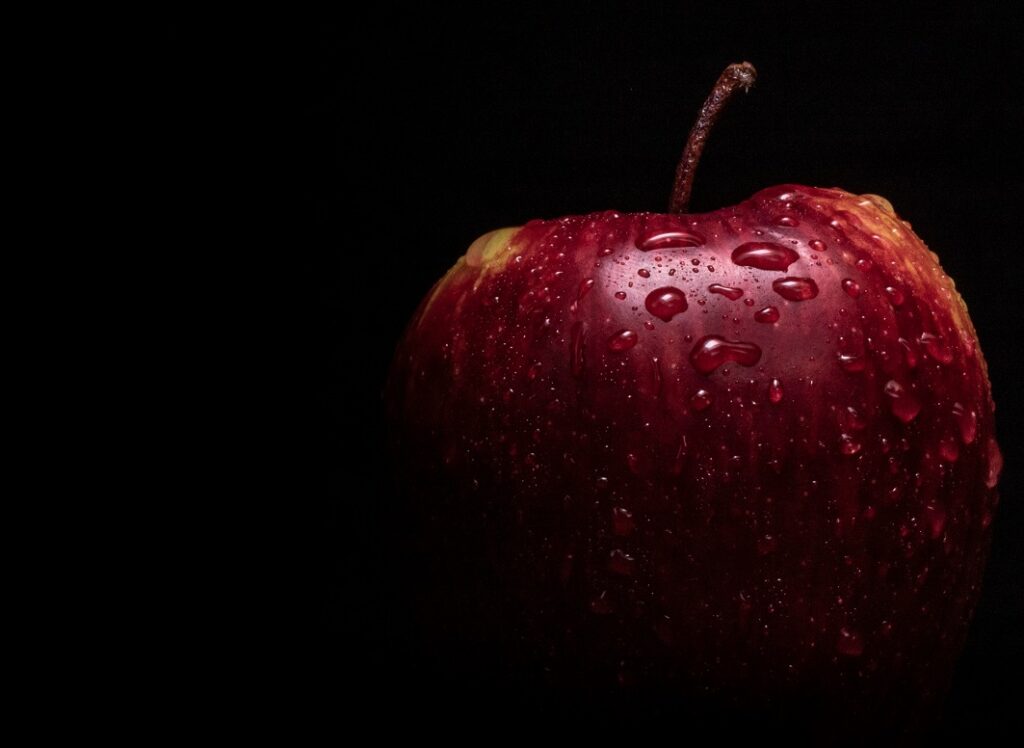
The photo will be much more pleasing if we crop the apple to the right. Now, viewers are drawn directly to the leading line instead of the empty space on the right.
Crop to Put Focus on the Subject
It is somewhat similar to framing for cropping. Sometimes, you include a lot of things in your image in addition to the main subject which may be distracting for the viewers. You can, of course, add a sense of emotion, context, texture, and color to the image by using these elements. But – you should get rid of them if your main goal is to focus entirely on the subject or something specific.
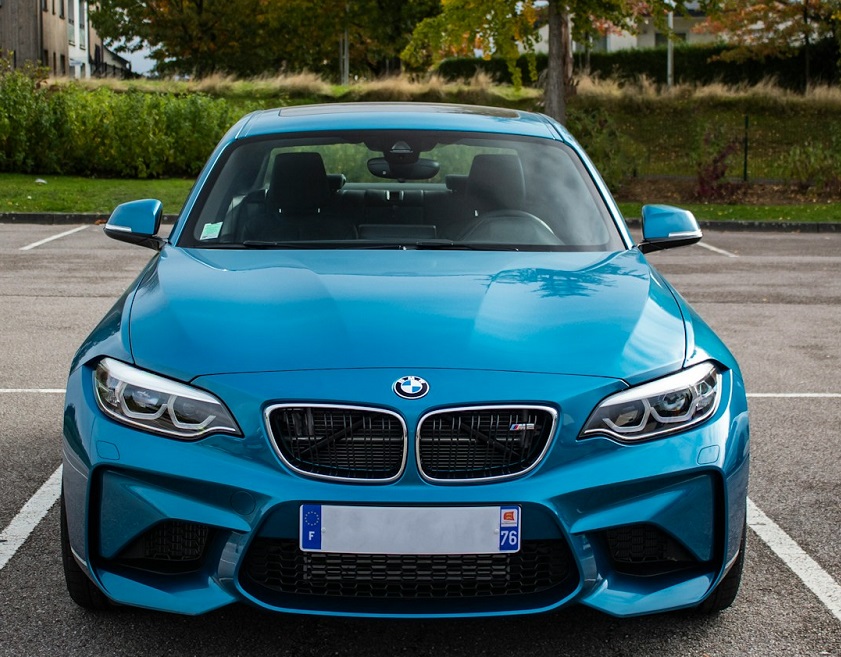
There are a lot of things in the photo of the car below. They reduce the overall impact of the car even though they add a lot of texture and content to the photo.

The image will become more visually appealing if you crop the image. You can keep some of the background elements but the focus should be on the car. Details such as headlights and the company’s logo are also more noticeable.
Cropping the Moving Objects
Cropping in photography offers limitless opportunities. Reframing for cropping is also highly useful when it comes to moving objects. It can give the impression that your subject is quickly going to fill the empty space in the image.
The unoriginal following picture has a lot of elements. But, you can quickly remove them through cropping.
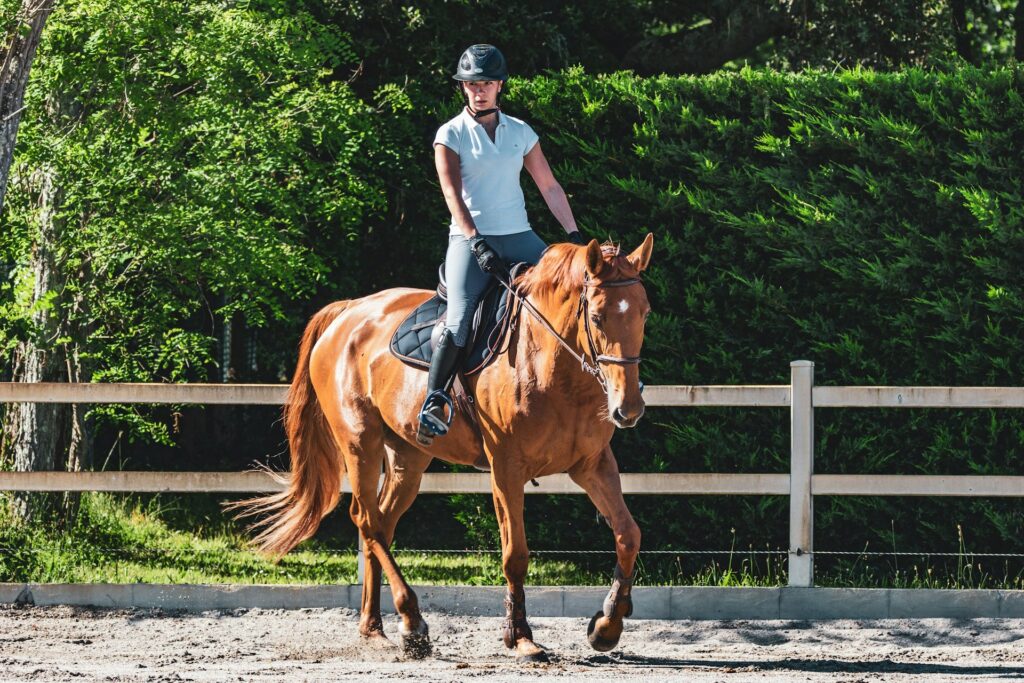
The main subjects of the image are the girl and the horse. However, you can effectively use the empty space around the pair since they are moving. Now look at the cropped and much improved version below.
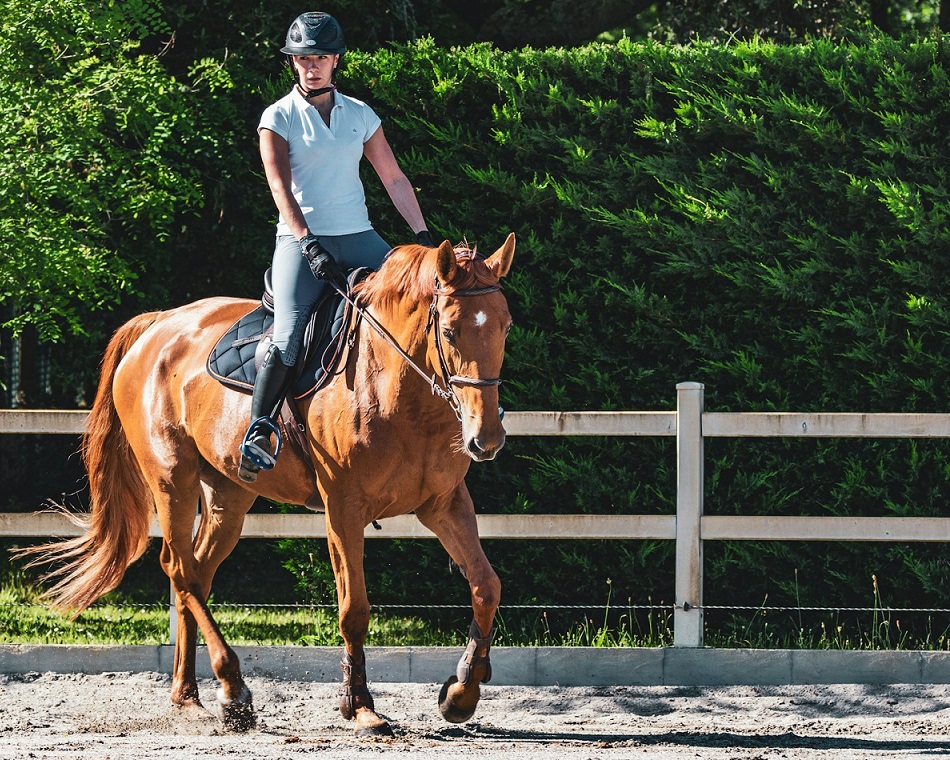
By emphasizing the empty space on the right, you can have a much better composition. It further highlight the movement of the horse from left the right.
Cropping for Panoramic Effect
It is quite easy to create a panoramic effect using photo cropping as well. Take a look at the following image. It is filled with details across the field.
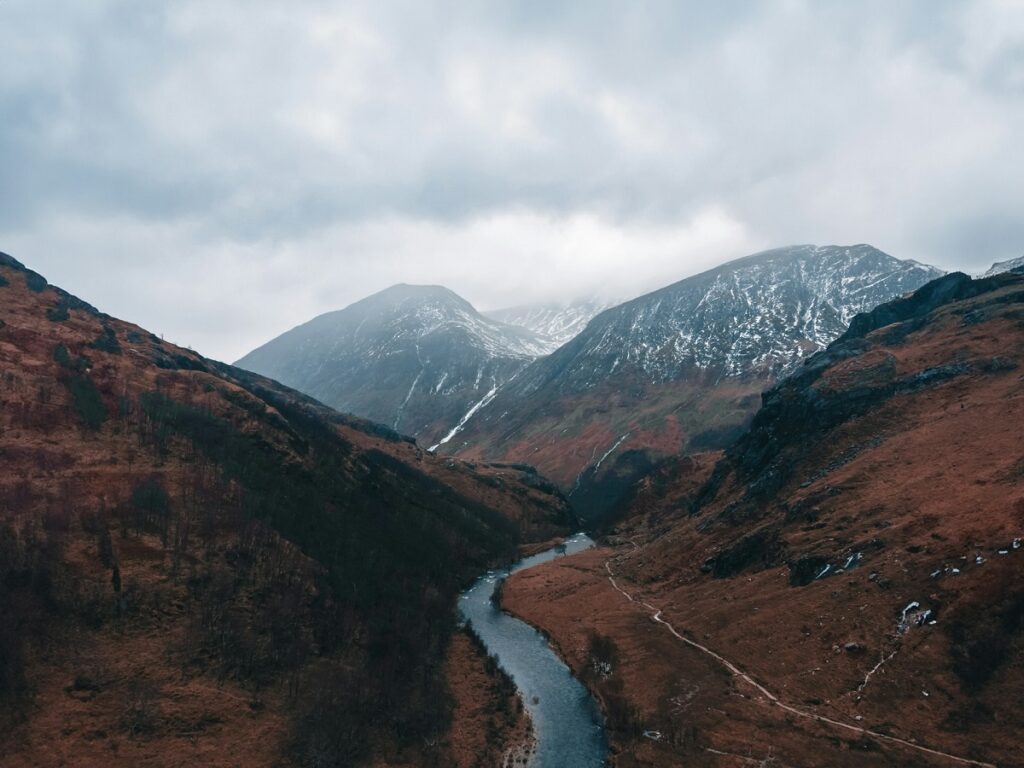
Now look at the cropped image. I have cropped the top and the bottom of the image. The result is a stunning panoramic effect highlighting the horizontal and elongated elements of the field.

Cropping for Portrait Orientation
You can also use crop to convert landscapes and other images to portraits. The following image is a standard wide or landscape image. The main subject is of course the girl but there are unnecessary elements and possibly excessive background.

Cropping the image creatively not only eliminates distractions but shifts the focus to the main object and also changes the orientation to portrait from landscape.
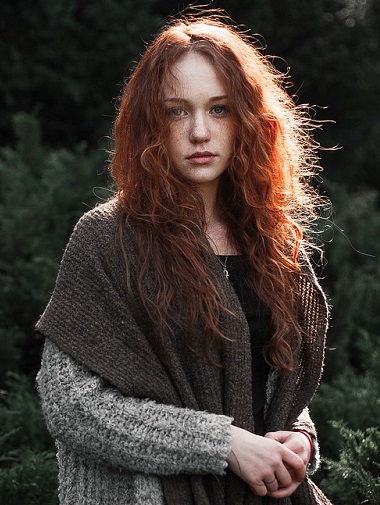
As a result, the composition is more visually stunning, more impactful, and strongly connects the subject with the viewers.
Crop out Boring Details
Cropping is also an excellent option to cut boring details from the image. Photos taken with wide angle lenses often have a lot of unnecessary objects. For example, you can capture some people if you are taking a photo of a landmark.

The easiest way to remove people or unwanted objects is by cropping them out.

Using Horizon while Cropping

Horizon happens to be an important part of your images while shooting landscapes. Your photos will look ugly if the horizon is tilted. It is true for all kinds of photographs not only for landscapes.
You must be careful while taking a picture. Either the horizon should be straight or you should straighten it in the post processing before you crop.
Sometimes, the horizon may be curved when you shoot the image with a wide angle lens. This is alright for some viewers but it has to be perfectly balanced from left to right.
Using Vertical Lines while Cropping

Vertical lines come into play when you are shooting a cityscape. You must be beware of skyscrapers for balanced composition because of their upright structure.
However, you cannot take a perfectly upright image when you are shooting with a landscape lens because of its unique perspective. Only a perfect horizontal level allows you to keep the lines vertical.
Cropping for balance in post production can easily remove this problem. Some tools such as Lightroom automatically correct and align the vertical lines.
But – you must capture photos at a perfectly horizontal level even if you are using tools like Lightroom. It becomes impossible to correct the photos if you tilt from the horizon too much.
Recommended Tools for Cropping Images
Almost all photo editing software such as Photoshop and Adobe Lightroom have a crop tool. After all, it is the most common post processing technique to adjust your images. Similarly, you can also do basic cropping in Microsoft Paint.
However, you have to install programs like Photoshop on your computer. They can be quite heavy and occupy a lot of space on hard disk. Therefore, some people look for a straightforward method to crop images. This is where cropping in photography online comes to your rescue.
Two of the most popular websites for image cropping are Image2go and Iloveimg. The first website allows you to change the aspect ratio, dpi, and resolution of the image. You can also export different file types.
Similarly, you can upload GIFs, PNGs, and JPEGs on the latter website. However, it does not offer as many choices as Image2go.
Some other popular websites to crop images online include ResizeImage, Picresize, Imagesplitter, etc.
Apart from websites, you can also install various apps on your mobile to crop images. The best cropping in photography app is Photoshop Express. It is particularly great for cropping images for social media. It is also free to use. Photoshop Express also marks the sizes of the images for various platforms. Therefore, you do not have to worry about them at all.
Other notable cropping apps include YouCam Perfect, Image Size, PicsArt, PhotoDirector, etc.
You must use Photoshop or Lightroom if you want to crop images for professional use. However, tools like GIMP and Lumina NEO are also excellent for professional work.
Frequently Asked Questions
What does cropping mean in photography?
Cropping in photography refers to the process of removing parts of an image to enhance framing, alter the aspect ratio, or improve the overall composition. It allows photographers to focus on the most important elements of a scene and remove distractions.
Why is cropping image important?
Cropping is important because it can drastically improve the composition and focus of an image. It allows photographers to remove unwanted elements, adjust the framing to follow compositional rules like the Rule of Thirds, and emphasize the main subject more effectively.
What is cropping subject in photography?
The cropping subject in photography means the photo’s main focus or subject matter that remains after the cropping process. It involves choosing which parts of the image to keep and which to remove, ensuring the subject is highlighted in the best possible way.
What are the types of cropping an image?
Types of cropping in an image include tight cropping (closely framing the subject), loose cropping (leaving more space around the subject), and aspect ratio cropping (changing the shape of the image to fit specific dimensions, such as for social media or print formats).
What are three tips in cropping an image?
Three tips for effective cropping include:
1. Use the Rule of Thirds to position the subject for a balanced composition.
2. Ensure not to crop too tightly around the subject, leaving some space to avoid a cramped look.
3. Be mindful of cutting off important elements or limbs of subjects, which can lead to an awkward composition.
Final Thoughts
Cropping is the easiest adjustment you can make to an image. But – its effects can be overwhelming and it can make your dull images visually pleasing.
I hope you have learned how to crop your images creatively and fully leverage the huge potential of this simple tool.

