
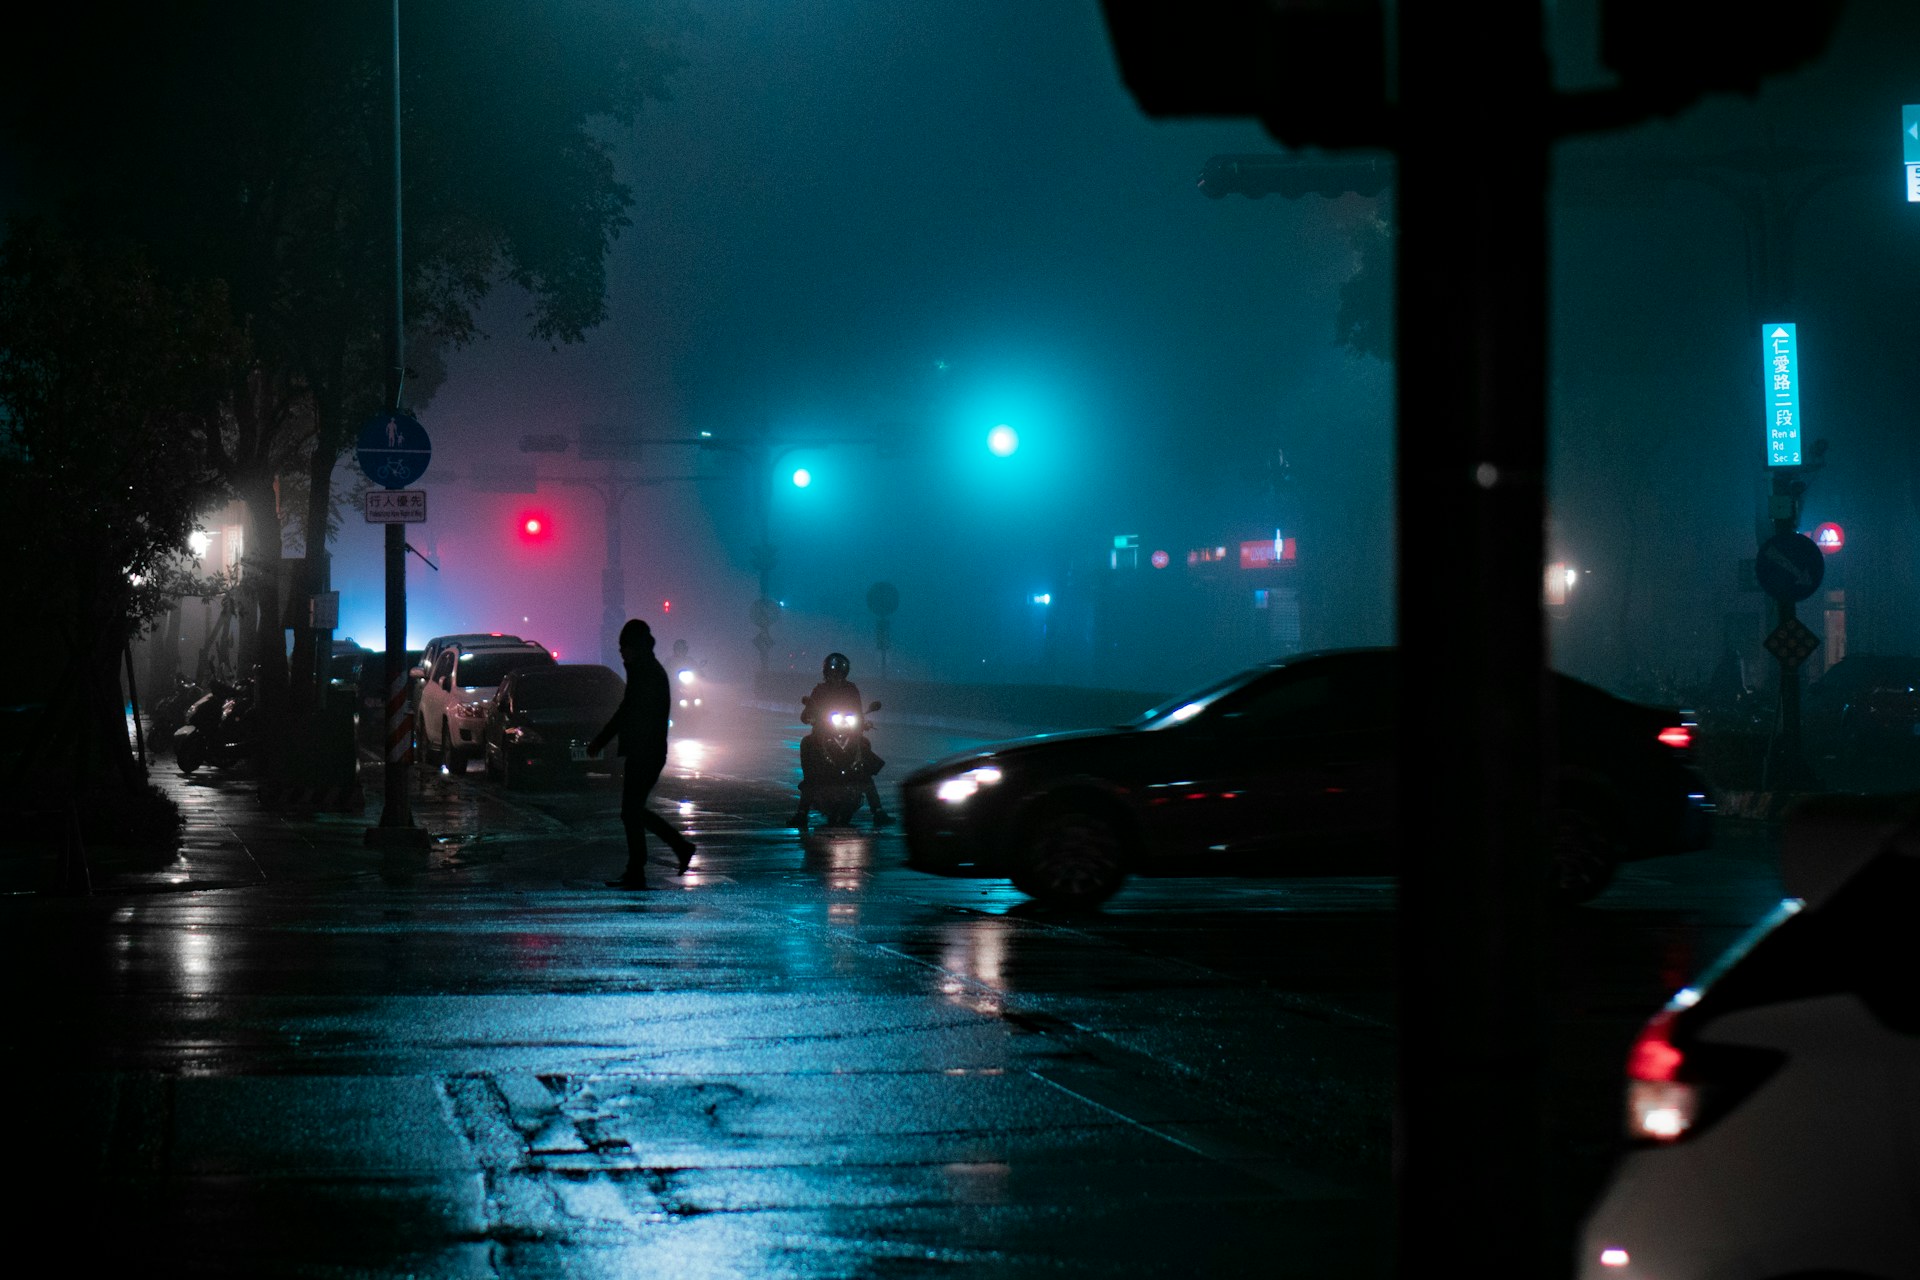
It requires a lot of practice to take beautiful pictures in darker places. You have to deal with low light on regular occasions as a photographer. However, it is especially a nuisance for novices and beginners. In this article, we are going to explain how to shoot in low light for you to take beautiful images in various light conditions.
One of the most difficult photography techniques to master is shooting in low light. You would not always get the best possible light for your images. Using a built-in flash will brighten the photos for you but they will also be unnatural, lifeless, and harsh with annoying shadows. However, shooting without a good light source can also create blurry and grainy photos. But – you can employ several techniques to take splendid images in low light without using a flash.
What is Low Light Photography?
Low light photography refers to taking photos in places where you need a special light source such as a torch or a flash. It also requires special camera settings and compromises such as reducing the shutter speed or increasing the ISO to get the best results.
Most people wrongly assume only night photography, from dusk till dawn, is low light photography. Any place having less than daytime light outside, such as indoors, also falls in this category. You can consider inside of your homes, hotels, restaurants, etc. that don’t receive as much light as this kind of photography. In simple, words it covers all the places that are devoid of enough natural light to create crisp, sharp, and clear photos.
Best Tips for Shooting in Low Light
The following are some of the best tips to improve the quality of your photographs in various low light situations, both outdoors and indoors.
What are Levels of Low Light?
Before moving on to the tips, we must discuss different levels of low light. We can categorize light as visible light, low light, and dark light. Keep in mind that we have made these categories just for the sake of explanation. In reality, it is extremely difficult to categorize light because it ranges from very bright to pitch black and innumerable light environments in between.
Visible Light
Visible light is the light you get when you stand in shadows behind trees, large buildings, and bridges during the daytime.
Low Light
You can still see everything clearly in your surroundings for a few minutes after sunlight. That light is classified as low light.
Dark
When you cannot see anything other than bright objects such as in the night.
All the photographers, both beginners and professionals, have experienced all these kinds of lights in their careers. It may be a cumbersome task even for an experienced photographer to take good photos in these situations. Therefore, we are going to discuss each of them individually in the following lines.
1. Low Light Photography Settings for Visible Light
Your images could come out blurry if you are taking them from shadows such as when you are standing behind a building or a tree. It is especially frustrating for new DSLR users who usually have no idea what is going on.
Even though you are shooting during the day with ample natural light, your camera may not be receiving enough light to effectively take the shot because of your position or where you are standing. It can result in one of two things that are a lot of noise in the images or blurry images or both in some cases.
So, how do you take excellent photos in these situations?
Shoot at a High Shutter Speed
The first thing you can do to keep blurs at bay is to shoot at high shutter speeds. Moving subjects will give you motion blurs or camera shakes if you use low shutter speed. Therefore, try to shoot at a faster shutter speed to avoid these problems.
What is a fast shutter speed you may ask? It depends on the size and focal length of your camera sensor and lens respectively. For example, a shutter speed of 1/50th will do fine if you are using a small sensor or a point and shoot camera with a wide-angle lens to take photos. However, your handheld techniques also play a pivotal role in determining the shutter speed.
You can set the shutter speed to a fraction of your focal length to take sharp, and crisp photos in low light. For instance, go for a shutter speed of 1/30th of a second for a 30mm wide-angle lens, 1/50th, for a 50mm portrait lens, and 1/100th for a 100mm telephoto lens.
Shutter speeds from 1/250th to 1/200th of a second will produce the desired results without camera shakes and motion blurs for an average photographer.
Use the Fastest Aperture Possible
Another thing you can do is to use lenses with fast apertures, typically higher than f/2.8. Faster or wider apertures allow plenty of light to enter the camera, something you need to shoot at fast shutter speeds.
Aperture is denoted by the f-number on your camera such as f/2.8, f/1.8, and f/1.4. The lowest f-number means “maximum aperture” and vice versa.
Using the maximum or fastest aperture possible allows you to use faster shutter speeds as well. You can either manually override your aperture or switch to the ‘Aperture Priority’ mode. Subsequently, get to the lowest possible f-number on your camera which is the maximum aperture. For example, the maximum aperture on a 16mm f/1.4 lens will be f/1.4. It will move from f/3.5 to f/5.6 on an 18-55mm lens depending on which focal length you use.
Use Image Stabilization (IS)
Your camera or lens also needs to have some sort of image stabilization if you want to use faster shutter speeds. Without image stabilization, images can be blurry even if you use the fastest of apertures.
Latest image stabilization techniques from brands like Canon, Nikon, Fujifilm, and Sony have revolutionized handheld shooting by offering up to 5-stops of compensation. Even some third-party manufacturers have come up with really nice image stabilization systems and technologies. They can practically eliminate camera shakes and shivers while taking handheld photos.
Image stabilization also enables you to use slower shutter speeds. For instance, you only need 1/15th of a second to take sharp images with image stabilization and 1/250th of a second without IS to take an image of the same quality.
While many zoom lenses from both Canon and Nikon have built-in image stabilization they are much slower and less sharp than most prime lenses, unfortunately. Therefore, you should go for a fast lens with in-body image stabilization. The good news is that manufacturers are offering image stabilization in both cameras and lenses these days.
Choose a Faster Lens
All the above things are only going to work if you have a good and fast lens. Keep in mind that it is the lens that has maximum aperture, not the camera. Different types of lenses have different maximum apertures as well. For example, an average consumer lens has an aperture range of f/3.5-5.6 at best. The maximum aperture for a majority of professional zoom lenses is f/2.6. Prime lenses (fixed lenses) are the fastest as some of them have a maximum aperture of f/1.8 or even f/1.4. You would also find maximum apertures as fast as 0.95 on some exotic and specialty prime lenses.
As we have already discussed, the faster the aperture, the more light will enter the camera and the better will be the photos in low light.
Opening the aperture at lower f-numbers will increase your shutter speed. Let’s assume you are shooting at 1/250th of a second and f/8 aperture. You can quadruple the shutter speed to 1/500th of a second by lowering the aperture to f/4. You can easily freeze the action using such a shutter speed.
However, you must use faster apertures such as f/1.8 carefully otherwise they can also cause a shallow depth of field, putting your subject out of focus.
Use High ISO
ISO means how sensitive your camera is to light. It can come in handy when you are getting slower shutter speeds despite using the maximum aperture of your lens. You can make the photos brighter simply by increasing your camera’s ISO.
Let us suppose a shutter speed of 1/50th of a second and ISO 200 are giving you blurry images. What you can do is obtain a shutter speed of 1/200th by increasing ISO to 800. The formula to calculate ISO and the corresponding shutter speed is simple. You can double the shutter speed by doubling the ISO. Therefore, increasing ISO from 200 to 400 will give you 1/100th of a second, and subsequently, increasing it to 800 will result in 1/200th of a second.
Once again, images taken at high ISOs can be grainy or have a lot of digital noise. But – how to shoot in low light without grain at high ISO. The answer is to buy a good camera that can counter noise at higher ISOs. Most cameras can perform pretty well up to 1600 whereas high-end professional full-frame cameras can handle noise levels of up to 6400 and even higher.
2. Low Light Photography Settings for Low Light

Now we have a more complex situation at our hands. You are shooting inside a poorly lit building or the light is quickly fading after sunset. You will instinctively and instantly increase your camera’s ISO and increase the shutter speed. After all, that is what you need to do in case of low light. However, a time will come when even the maximum aperture and the highest possible ISO won’t offer you the results you are looking for.
What are you going to do in this situation?
Bring the Light Source Close to the Subject
The first thing to do in this case is to bring the light source closer to your subject. It will enable your camera to use more light. You can do many things to brighten up the room such as removing the curtains and opening up those big windows. It will allow plenty of exterior light to enter the room, considerably improving your images.
Other types of lights you can use here are external flashes, speedlights, regular bulbs, etc.
Stabilize Yourself
You not only need to stabilize your camera but yourself as well. You can hold your camera even more effectively if can perfectly stabilize yourself while capturing your subjects. Put the palm of your left hand at the center of the weight, usually between the camera body and the camera lens to support the camera. Now, pull your elbows as close to your body. It is even better to sit down and put your left arm on your knees for better support. Try to take sharp images by gently pressing the shutter.
Learning to stabilize yourself requires you to practice a lot but in the end, you can shoot splendid photos at slow shutter speeds without any blurs.
Shoot in RAW
Have you ever wondered how to shoot in low light without missing any detail? The answer is to shoot in RAW. RAW files can hold much more information compared to compressed JPEG files. Shooting JPEG means you cannot recover all the information besides under or overexposing the image in low light. RAW images allow you to highlight details like shadows without much digital noise in the post-processing.
Use High ISO Number
You have to ultimately decide between two things. Do you need sharp images with noise or blurry images? Most experienced photographers will go for the former. Try to take a shot at high ISO and see what happens. Most often the level of noise will be acceptable but if it is not, you can use any of the excellent noise-removal programs to improve the image. Recheck the image after post-processing and see if it is up to the mark now.
Try not to go above 1600 but you can use ISO 3200 when required. A good full-frame camera even allows you to go as high as ISO 12800 without any serious noise.
Use a Large Sensor
Despite being expensive, a camera with a large sensor can impart a new life to your images taken in low light. For instance, an APS-C or a Micro Four Thirds camera has considerably less noise in images compared to smaller point and shoot cameras. Larger sensors also allow you to use high ISO, truly making a huge difference. Most people wrongly assume camera resolution is the deciding factor in low light but it is the sensor size that matters.
Use Autofocus Carefully
The autofocus performance of the camera may start declining in low light. It usually happens in the case of extremely low light to work with, making it difficult for the camera to distinguish between different objects.
Most modern cameras come with the “AF Assist” feature. It is a special light for autofocus in front of the camera. It illuminates the subject by lighting up like a flashlight when there is not enough light available. You must use this function in low light if your camera has it.
Also, ensure that the image looks sharp in the viewfinder. Half press the autofocus/shutter button to reacquire the focus if it looks blurry. In some cases, it is impossible to know whether or not the camera has focused on the subject before taking a picture. Check for the sharpness in the rear LCD after zooming in to confirm if the subject has been focused or not.
Use a Monopod or a Tripod
One of the best methods to keep your camera and lens still in low light is to use a tripod. It allows you to shoot at incredibly low shutter speeds, use high dynamic range, and keep noise to the minimum by setting your ISO to the lowest value. Slow shutter speeds can cause motion blurs but it is not a problem in some cases. In fact, they look pretty cool sometimes. All you need to ensure is to buy a robust tripod instead of cheap plastic ones available at a local store.
3. Low Light Photography Settings for Dark Conditions
We have already learned how to shoot in low light but what to do when there is practically no light to work with?
You don’t have any light to use in the darker conditions such as during the night, rendering some of the above techniques inadequate or simply useless.
But – there are some other things you can do to take spectacular images in total darkness.
Use a Flashlight
Low light photography without flash is recommended but not in entirely dark places. You would have to use a flashlight for light painting if your subject or environment is too dark. Light painting can help you take stunning images in the dark and create some cool effects as well. The trick is to use as many colors as you can.
Use a Tripod
If you don’t want to intentionally have a lot of blur in the images, you must not take handheld images at night. Night photography is simply impossible without a sturdy tripod. You mostly have to use slow shutter speeds that can result in a lot of camera shakes and movements. Using a tripod is the best way to counter these movements.
Similarly, it is better to use a cable release system or remote control in such situations. You can also use Exposure Delay mode or the timer on your camera. Some cameras also have a very nice function, the ‘electronic front curtain shutter’ to minimize shutter shock and similar vibrations caused by the camera.
Try Manual Focus
As mentioned above, autofocus cannot work or its performance declines in complete darkness. You can get good focus by using the AF Assist feature only if your subject is close. Similarly, a flashlight will allow you to illuminate the subject if it is further away and regain focus. However, you must resort to manual focus if you don’t have a flashlight and the subject is too far away. Zooming in with live view and using the manual focus will offer you much better results in this case.
Another excellent tip is to turn off the autofocus once it has focused on the subject. It will prevent the camera from focusing again. Never touch the focus ring after you have acquired focus as well. You have to adjust focus according to the selected focal length.
Practice Hard
Words cannot assert the importance of practicing again and again and again. You have to practice hard to perfect your craft irrespective of your profession. You can only attain success if you practice regularly, work hard, and remain consistent.
Leave your comfort zone and take pictures at various places in different light environments. Never hesitate to experiment with different camera settings and functions as well. Only then you will learn the tricks of the trade and become an exceptional photographer and take amazing photos in any light condition.
Also Read: How Does a Camera Capture an Image?
Frequently Asked Questions
What camera setting is best for low light?
For low-light photography, the best camera setting is a wider aperture (lower f-number), a slower shutter speed to allow more light to hit the sensor, and a higher ISO setting, though this can introduce noise. Using a tripod can help manage the slower shutter speeds without causing blur from camera shake.
What ISO is best for low light?
In low-light conditions, a higher ISO setting, such as ISO 1600, 3200, or even higher, depending on the camera’s performance, can significantly improve exposure. However, be mindful that increasing ISO also increases image noise, so it’s about finding the right balance.
How do you film better in low light?
To film better in low light, use a camera with good low-light sensitivity, set a wider aperture, increase the ISO while being cautious of noise, and consider using additional light sources or reflectors to subtly enhance lighting without ruining the ambiance. A tripod or stabilizer can also help reduce shake in low-light conditions.
How do you shoot in a dark room?
Shooting in a dark room requires maximizing the camera’s light intake by using a wide aperture, increasing the ISO (with noise reduction techniques if necessary), and using a slow shutter speed, ideally with a tripod. Additionally, consider using external light sources, like soft LED lights or reflectors, to gently illuminate the scene without overpowering the natural darkness.
Final Thoughts
Now you have a fair idea of how to shoot in low light. We must say that low light photography can be challenging and fun at the same time. You can add a valuable and coveted skill to your repertoire if you learn how to take pictures in low light.