
In this article, we are going to discuss the best indoor macro photography tips, the gear needed for indoor macro photography, and how to use different photography techniques to take brilliant photos indoors.
Macro photography is a unique and captivating genre of photography that involves capturing small subjects in extreme close-up, revealing details often invisible to the naked eye. This technique magnifies the subject, making it appear much larger than its actual size in real life. Common subjects include the intricate patterns of a leaf, the delicate structure of an insect, or the complex texture of everyday objects. Macro photography transforms these ordinary subjects into extraordinary, almost alien landscapes, showcasing an entirely new perspective of the world around us.
Engaging in indoor macro photography at home offers a fun and creative outlet, especially ideal for indoor settings. It’s a fantastic way to explore the beauty and intricacies of the smaller world that often goes unnoticed. This form of photography is accessible and rewarding, requiring only a camera and a keen eye for detail. Whether it’s exploring the fine lines of household items or the subtle beauty of indoor plants, macro photography at home encourages photographers to think creatively and find beauty in the minutiae of their everyday surroundings.
Benefits of Indoor Macro Photography
Before we move to indoor macro photography tips, it is pertinent to discuss the benefits of Indoor macro photography.
Learning New Skills
Indoor macro photography provides an excellent opportunity for photographers to hone their skills and learn new techniques. This genre requires a keen eye for detail, steady hands, and patience. Photographers learn to manipulate lighting, understand the nuances of their camera settings, and experiment with composition and depth of field. These skills are not only valuable for macro photography but also enhance general photography expertise.
Experimenting with Diverse Subjects
One of the joys of indoor macro photography is the sheer variety of subjects available within the home. From the texture of fabrics to the patterns on household items, the possibilities are endless. This environment allows photographers to experiment freely, trying out different subjects without the need for extensive travel or special equipment. It’s a playground for creativity, encouraging photographers to look at everyday objects through a new, magnified lens.
Overcoming Weather and Location Limitations
Unlike outdoor photography, indoor photography is not dependent on weather conditions or specific locations. This makes it an ideal activity regardless of the season or time of day. It offers the flexibility to shoot at any moment, removing the constraints of external environmental factors.
Indoor macro photography is particularly valuable for those living in areas with unpredictable weather or for photographers who have limited mobility or access to diverse outdoor locations. Indoor macro photography ensures that the pursuit of capturing stunning images can continue, no matter what the outside world presents.
Cost-Effective and Accessible
Indoor macro photography can be remarkably cost-effective. Unlike some other forms of photography that might require travel or special conditions, macro photography can be done in the comfort of your home with everyday items as subjects. Beginners can start with basic equipment they already own, like a standard DSLR camera and a macro lens, or even a smartphone with a macro mode. This accessibility makes it an ideal starting point for those new to photography or looking to practice without significant investment.
Enhancing Observation and Creativity
Engaging in macro photography indoors encourages a heightened sense of observation and creativity. Photographers begin to view their immediate environment with a new perspective, finding beauty and interest in the most mundane objects. This process nurtures creativity, as it challenges photographers to transform ordinary subjects into captivating images. It’s a process that enhances mindfulness and appreciation for smaller details, enriching the photographer’s artistic vision.
Ideal for Solo Projects
Macro photography is perfectly suited for solo projects, offering a meditative and introspective experience. It allows photographers to work at their own pace, focus on their personal creative vision, and experiment without external pressures. This solitude can be particularly therapeutic and rewarding, providing a space for personal growth and artistic exploration.
Perfect for Educational Purposes
For those interested in education, either as teachers or students, indoor macro photography serves as a fantastic educational tool. It can be used to explore and explain concepts in biology, art, and physics, among others. Capturing detailed images of household items, plants, or small creatures can provide a visual aid that enhances learning and curiosity.
Opportunity for Technical Mastery
Indoor macro photography offers an unmatched platform for mastering technical aspects of photography. It involves managing challenging lighting conditions, understanding the behavior of different lenses, and controlling depth of field and focus with precision. This technical prowess is transferable to other photography genres, making it a valuable practice for both amateur and professional photographers.
Equipment for Indoor Macro Photography
Camera
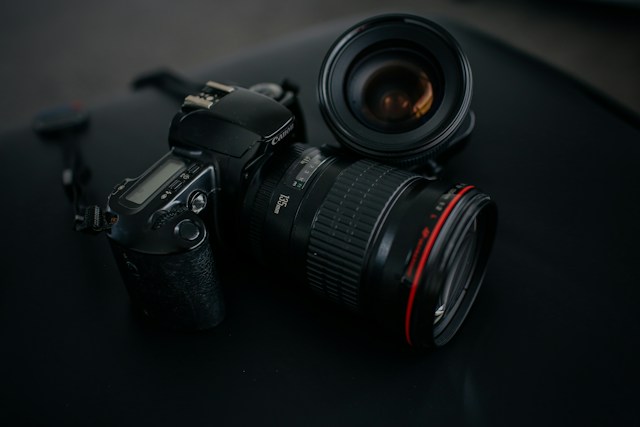
A DSLR or mirrorless camera is typically preferred for indoor macro photography, although advanced compact cameras can also be suitable. These cameras offer the manual controls and high-quality image sensors needed for detailed macro work. A camera with a high megapixel count is beneficial for capturing the intricate details of small subjects. Additionally, features like a tilting LCD screen can make it easier to compose shots at awkward angles, which is common in macro photography.
Macro Lens
A dedicated macro lens is essential for true macro photography. These lenses are specially designed to capture small subjects at very close distances, offering life-size or greater magnification (1:1 ratio or higher). They come in various focal lengths, with longer lenses (90mm to 200mm) providing greater working distance between the camera and the subject, which helps shoot skittish subjects like insects. Lenses with shorter focal lengths (like 50mm or 60mm) are typically more affordable and compact but require getting closer to the subject.
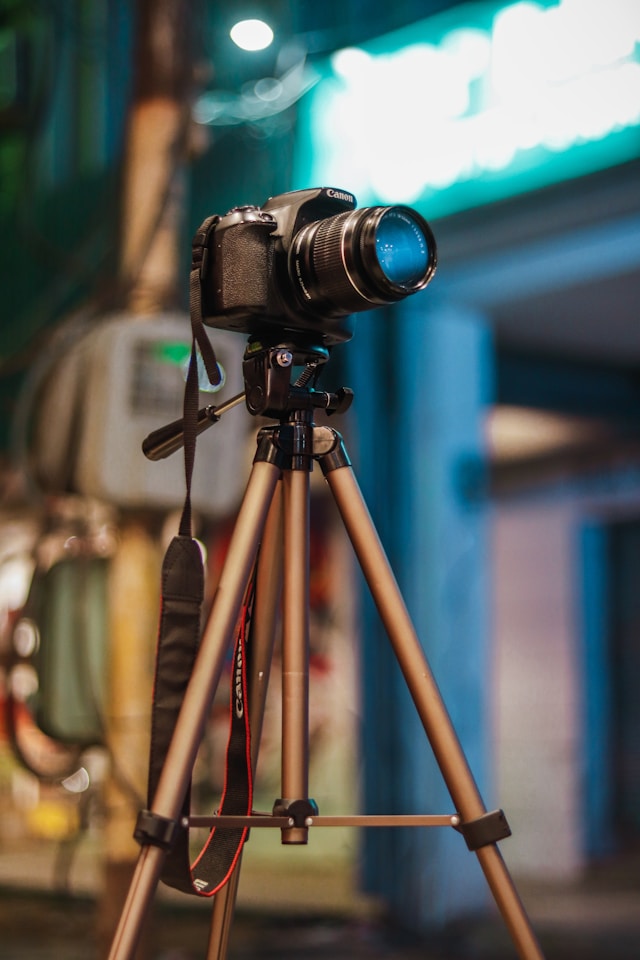
Tripod
A tripod is crucial for stabilizing the camera during macro shots. Macro photography often requires long exposure times, especially in indoor settings with limited light, making camera stability key to achieving sharp images. A tripod with adjustable and extendable legs is ideal, as it allows for easy positioning at various heights and angles. Some tripods also offer a reversible center column or an arm that can extend horizontally, which is particularly useful for overhead or close-to-the-ground shots.
Remote Shutter Release
A remote shutter release, whether wired or wireless, is an important tool in reducing camera shake. When shooting at high magnifications, even the slightest movement can blur the image. A remote shutter allows the photographer to take a picture without physically touching the camera, thus eliminating the risk of movement caused by pressing the camera’s shutter button. This tool is especially useful for long-exposure shots where even minimal vibration can affect the image quality.
In summary, the right equipment in indoor macro photography – a capable camera, a dedicated macro lens, a stable tripod, and a remote shutter release – plays a vital role in capturing detailed, sharp, and high-quality images. These tools help in overcoming the challenges of macro photography, such as limited lighting and the need for precise focus and stability.
Best Lenses for Indoor Macro Photography
A lens plays a pivotal role in making your indoor macro photographs great. Choosing the right lens can make a big difference when it comes to taking sharp and beautiful photos. You can choose from a wide range of micro lenses but the following are the best according to our experts.
For Nikon Cameras
Nikon AF-S VR Micro-NIKKOR 105mm f/2.8G IF-ED
This is a popular choice for its versatility and image quality. The 105mm focal length provides a comfortable working distance, and the f/2.8 aperture allows for excellent low light performance and depth-of-field control. It also features Vibration Reduction (VR) for added stability.
Nikon AF-S DX Micro NIKKOR 40mm f/2.8G
Ideal for Nikon’s DX (crop sensor) cameras, this lens offers a life-size 1:1 magnification and a fast f/2.8 aperture. It’s compact, lightweight, and well-suited for close-up shots of flowers, insects, and small objects.
Nikon AF Micro-NIKKOR 200mm f/4D IF-ED
This lens stands out for its longer focal length, providing a greater working distance, which is perfect for photographing skittish subjects like insects. It’s known for its sharpness and excellent optical quality.
For Canon Cameras
Canon EF 100mm f/2.8L Macro IS USM
Part of Canon’s prestigious L series, this lens is renowned for its outstanding image quality, robust build, and Image Stabilization (IS) feature. The 100mm focal length is versatile for a range of subjects, and the IS helps in hand-held shooting.
Canon EF-S 60mm f/2.8 Macro USM
Designed for Canon’s APS-C (crop sensor) cameras, this lens offers superb sharpness and a life-size 1:1 magnification. Its 60mm focal length is equivalent to approximately 96mm on a full-frame camera, making it great for general macro photography.
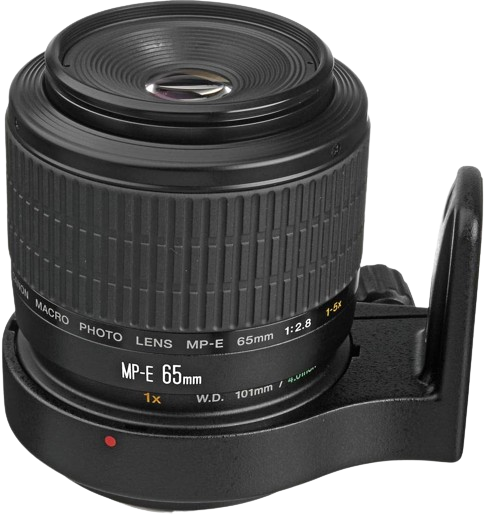
Canon MP-E 65mm f/2.8 1-5x Macro Photo Lens
This specialized lens is unique in its ability to provide magnification from 1x to 5x life size. It’s a manual focus lens designed for extreme close-ups and is a favorite among photographers who specialize in photographing very small subjects.
Each of these lenses has its own strengths, making them suitable for various aspects of macro photography. The choice of lens will largely depend on your specific needs, such as the subject matter you’re most interested in, whether you prefer a lens with image stabilization and the type of camera body you’re using.
We have covered the lenses for the two most popular camera brands. If you are using other cameras such as Sony or Olympus, you are advised to do your own research and find the lens that best suits your requirements.
How to Use a Tripod For Indoor Macro Photography?
Just like a lens, a tripod is a crucial accessory for indoor photography, especially macro photography. You must learn how to choose and use a tripod to give your photos a distinct edge. You need to look for the following three things while choosing a tripod for macro photography.
Height and Adjustability
The following three things are of the utmost importance when it comes to the height and adjustability of a tripod.
Adjustable Height
Choose a tripod that offers a range of heights, including very low positions. Macro photography often requires getting close to the ground or adjusting to various angles to capture the perfect shot.
Center Column Flexibility
A tripod with a reversible or horizontally extendable center column is beneficial. It allows for overhead or ground-level shooting, providing flexibility for different perspectives.
Compactness for Indoor Use
Consider the space you’ll be working in. A tripod that’s compact and easy to maneuver is ideal for indoor environments where space might be limited.
Stability is Crucial as Well
The tripod should also be stable enough to carry a camera which can be quite heavy depending on the model.
Sturdy Build
Look for a tripod that is stable and sturdy, even when fully extended. In macro photography, even slight vibrations can cause blur. Heavier tripods tend to be more stable, but materials like carbon fiber offer a good balance between light weight and stability.
Leg Locks and Rubber Feet
Ensure the tripod has reliable leg locks and rubber feet for grip. This is important for maintaining stability on various indoor surfaces.
Flexibility
Flexibility also involves a lot of things such as the following.
Variable Leg Angles
A tripod with legs that can spread independently allows for more creative angles and positioning, especially important in confined spaces.
Ball Head or Fluid Head
A tripod head that allows smooth and precise adjustments is crucial. A ball head offers ease of movement, while a fluid head might provide smoother control for fine adjustments.
How to Use a Remote Shutter for Indoor Macro Photography?
The main purpose of a remote shutter is to eliminate camera shake and increase flexibility. Here is how you can use it for macro photography.
Avoiding Camera Shake
Eliminating Physical Contact
Using a remote shutter release allows you to take photos without physically touching the camera, reducing the risk of a camera shake. This is especially critical in macro photography where even minor movements can result in a blurred image.
Long Exposures
For long exposure shots, a remote shutter is invaluable. It allows you to start and end the exposure without jostling the camera, ensuring sharp images.
Increased Flexibility
Shooting from a Distance
A remote shutter enables you to take photos from a distance, which is useful if your presence could disturb the subject (like in insect photography).
Convenience
It offers convenience and comfort, particularly in awkward shooting positions where reaching the camera’s shutter button might be difficult.
Types of Remote Shutters
Wired vs Wireless
Wired remotes ensure a stable connection but limit mobility. Wireless remotes offer more freedom to move around but ensure the remote is compatible with your camera model.
Smartphone Apps
Some modern cameras can be paired with smartphone apps that act as a remote shutter. This can be a convenient and versatile option if your camera supports it.
Selecting the right tripod and remote shutter for indoor macro photography significantly enhances the quality of your shots. A stable, adjustable tripod tailored to the indoor environment, combined with the stability and flexibility provided by a remote shutter, are key tools in capturing sharp, detailed macro photographs.
How to Use Aperture for Indoor Macro Photography?
Aperture refers to the opening within the lens through which light passes into the camera body. It’s like the iris of an eye, widening or narrowing to control the amount of light that enters. This opening is made up of a set of blades inside the lens, and its size can be adjusted.
Aperture size is measured in f-stops (f/numbers), such as f/2.8, f/5.6, f/11, etc. These numbers are a ratio of the lens’s focal length to the diameter of the aperture opening. A smaller f-stop number denotes a larger aperture and vice versa.
Depth of Field (Depth of Field) Control
Depth of Field is the range within a photo that appears acceptably sharp. It extends in front of and behind the focus point.
Aperture’s Role
Aperture size is one of the critical factors affecting Depth of Field. A wide aperture (lower f-number like f/2.8) creates a shallow Depth of Field, rendering only a small portion of the image in focus while blurring the background and foreground. This effect is often used to isolate the subject, drawing attention to specific details and creating an artistic blur or ‘bokeh’ in the out-of-focus areas. On the other hand, a narrow aperture (higher f-number like f/16) increases the Depth of Field, making more of the scene appear in focus. This is useful when you want to capture more detail throughout the subject, such as in detailed shots of insects or textures.
Balancing Depth of Field with Image Quality
In macro photography, achieving the desired Depth of Field often means balancing between enough background blur to isolate the subject and sufficient sharpness for detail. Extremely narrow apertures can lead to diffraction, where light waves interfere with each other as they pass through a small opening, reducing overall sharpness. Therefore, macro photographers often find a sweet spot, typically in the mid-range apertures like f/8 to f/11, depending on the lens and camera, to achieve a balance between a pleasing Depth of Field and maintaining image sharpness.
Light Management
Exposure Impact
Aperture directly influences exposure. A wide aperture allows more light to enter, brightening the image, which can be particularly beneficial in indoor macro photography where light levels are often lower. Conversely, narrowing the aperture reduces the light entering the camera, darkening the image. Thus, aperture adjustments must be balanced with changes in shutter speed and ISO to achieve the correct exposure.
Creative Effects
The choice of aperture also enables creative control over the photograph. For instance, a wide aperture not only isolates the subject but can also be used to capture light patterns and artistic effects like bokeh from indoor lights.
Optimal Aperture Values for Different Conditions
The following are the most optimal aperture values for different conditions for indoor macro photography.
Shooting Textured Subjects (like fabrics or natural objects)
Use an aperture around f/8 to f/11. This range typically provides a sharp focus on the intricate details while maintaining a pleasing background blur.
Capturing Subjects with Depth (like flowers or miniature models)
An aperture from f/11 to f/16 might be more appropriate. This range helps keep more of the subject in focus, which is essential when dealing with depth variations within the subject.
Isolating Details (like the eye of an insect or a water droplet)
Consider using a wider aperture like f/2.8 to f/5.6. This will sharply focus on the specific detail while beautifully blurring the rest of the scene.
Whole Subject Sharpness (like coins, stamps, or detailed artwork)
Here, f/16 to f/22 could be necessary, especially if the subject is flat and you want edge-to-edge sharpness. However, be wary of diffraction at very small apertures.
Each of these settings serves a purpose and can significantly affect the final image’s look and feel. The choice depends on the subject, the available light, and the desired artistic effect.
How to Create a Beautiful Boke or Background Blur Using the Aperture?
Creating a beautiful bokeh or background blur in macro photography primarily involves understanding and manipulating the aperture, but other factors like lens choice, distance to the subject, and the background itself also play significant roles. Let’s explore how to achieve this effect with detailed settings and considerations.
Wide Aperture for Bokeh
To create a pronounced bokeh effect, use a wide aperture (a lower f-stop number like f/2.8, f/3.5, or f/4). A wide aperture decreases the depth of field, sharply focusing on the subject while rendering the background and foreground as a smooth blur. The wider the aperture, the more pronounced the bokeh effect will be.
Experiment with Aperture Range
While extremely wide apertures yield strong bokeh, they also narrow the plane of sharp focus, which can be challenging in macro photography. Experimenting with slightly smaller apertures (like f/5.6) might still provide a good bokeh effect while keeping more of your subject in focus. The ideal setting can vary based on the lens and the distance to your subject.
How to Use Shutter Speed for Indoor Macro Photography?
Shutter speed refers to the amount of time the camera’s shutter is open to expose light to the camera sensor. It’s a critical component in determining both exposure and motion blur in a photograph.
Shutter speed is measured in seconds or, more commonly, fractions of a second (e.g., 1/500, 1/60, 1/2). Faster shutter speeds mean the shutter is open for a shorter period, while slower speeds mean it stays open longer.
Shutter Speed’s Role in Exposure
Light Exposure
The longer the shutter is open (slower shutter speed), the more light enters the camera, affecting the exposure of the image. Conversely, a faster shutter speed allows less light in, which can be used to prevent overexposure in brightly lit conditions.
Motion Capture
Shutter speed is crucial for capturing motion. Fast speeds can freeze motion, while slow speeds can create a motion blur effect, conveying movement in a still image.
Using Shutter Speed to Blur or Freeze Motion
You can use also shutter speed to create beautiful blur or motion-freeze moments.
Fast Shutter Speed for Freezing Motion
To freeze motion in macro photography, such as capturing a droplet of water splashing or an insect in flight, you’ll need a fast shutter speed. This could range from 1/500th of a second to even 1/4000th, depending on the speed of the subject’s movement.
When using fast shutter speeds, especially in indoor settings with limited light, you may need to compensate with a wider aperture or higher ISO to maintain proper exposure.
Show Shutter Speed for Creating Motion Blur
For creative effects like blurring a moving subject (e.g., a spinning object or falling grains of sand), a slower shutter speed is used. This could be anywhere from 1/30th of a second to several seconds, depending on the desired level of blur.
When shooting with slow shutter speeds, a tripod is essential to stabilize the camera and prevent unwanted blur from camera shake.
Optimal Shutter Speed Values for Different Effects and Objects
The following are the optimal shutter values for different objects and effects related to indoor photography.
Freezing Fast Motion (e.g., splashing water, flying insects)
1/1000th to 1/4000th of a second. These speeds are fast enough to capture sharp images of fast-moving subjects without motion blur.
Capturing Moderate Motion (e.g., slow-moving insects, dripping liquids)
1/250th to 1/500th of a second. This range can effectively freeze moderate movement, useful for subjects like slowly moving bugs or gently falling droplets.
Creating Slight Motion Blur (e.g., swaying flowers, moving subjects)
1/15th to 1/60th of a second. These slower speeds allow for a slight blur, which can convey motion while keeping some elements of the subject relatively sharp.
Long Exposures for Artistic Blur (e.g., flowing water, light trails)
1 second to 30 seconds or more, depending on the effect desired. Long exposures are typically used for creative and artistic effects, like turning flowing water into a silky smooth stream or capturing light trails.
General Still Life and Stationary Subjects
1/60th to 1/125th of a second. This range is often sufficient to capture sharp images of stationary subjects in indoor macro photography, assuming there’s no significant movement.
In macro photography, the choice of shutter speed is crucial not just for exposure, but also for creatively capturing or freezing motion. The optimal shutter speed will vary depending on the lighting conditions, the movement speed of your subject, and the artistic effect you want to achieve.
How to Use ISO for Indoor Macro Photography?
ISO represents the sensitivity of your camera’s sensor to light. Originally derived from film photography, where it indicated the film’s sensitivity to light, in digital photography, it’s a key setting that affects both the exposure and the quality of your images.
ISO values typically start from a base level (like ISO 100 or 200) and can go up to very high numbers (like ISO 6400, 12800, or even higher). Lower ISO values mean the sensor is less sensitive to light, while higher values increase sensitivity.
Impact on Images
ISO can have different impacts on images depending on what range you have selected.
Exposure Control
By adjusting ISO, you can control the camera’s ability to capture light. Higher ISOs are used in low light conditions to brighten the image. Conversely, in brightly lit conditions, a lower ISO helps prevent overexposure.
Image Quality
Higher ISO settings can introduce noise (graininess or speckles) into your images. While this might be acceptable or even desirable in some artistic contexts, generally, lower ISOs are preferred for cleaner, clearer images.
Using ISO to Balance Exposure and Noise in Indoor Macro Photography
In indoor macro photography, managing the delicate balance between exposure and noise with ISO settings is a nuanced aspect. Here’s a detailed look into how to effectively use ISO in such environments.
ISO and Exposure
ISO settings control the sensitivity of your camera’s sensor to light. In low-light conditions, such as those often found indoors, increasing the ISO value allows the camera to capture more light, brightening the image. This is especially useful in macro photography, where you might be working with small apertures (for depth of field) and fast shutter speeds (to avoid blur).
ISO and Noise
Higher ISO values, while beneficial in low light, come with the drawback of increased noise or graininess in the image. This noise can be particularly noticeable in the uniform and detailed backgrounds typical of macro shots, potentially detracting from the clarity and quality of the image.
Strategies for Balancing ISO in Indoor Macro Photography
It can be a cumbersome task to properly balance ISO for indoor photography. Using high ISO can result in grainy images while ISO cannot usually tackle darker conditions. However, you can employ different strategies to balance ISO and come up with strikingly sharp and beautiful photos.
Starting Point
Begin with the lowest ISO setting that allows you to achieve a correctly exposed image with your desired aperture and shutter speed. For many indoor settings, this might be around ISO 400-800.
Incremental Increases
If the image is too dark, gradually increase the ISO. Modern cameras generally produce good quality images at ISO values up to 1600 or even higher. The key is to increase ISO only to the point where you get a satisfactory exposure, without unnecessary escalation that would introduce more noise.
Camera and Lens Capabilities
Be aware of your camera’s performance at high ISO levels. Some cameras handle noise better than others at higher ISOs. Similarly, lenses with wider maximum apertures can allow more light, potentially reducing the need for very high ISO settings.
Post-Processing
Remember that some noise can be addressed in post-processing. Software tools can effectively reduce noise, although this may sometimes come at the cost of some detail. Shooting in RAW format provides more flexibility for noise reduction in post-processing compared to JPEG.
Supplemental Lighting
Consider using additional light sources, like ring lights or softbox lights, which can enable lower ISO settings. Even a simple reflector can help bounce light onto your subject, brightening the scene naturally.
Balancing the Triangle
Always keep in mind the exposure triangle – ISO, aperture, and shutter speed. Adjusting one of these elements will often require changes to the others to maintain the desired exposure. For instance, if you increase the ISO and find the image too bright, you might need to adjust the shutter speed or aperture accordingly.
Test and Experiment
Each indoor setting can be different. Testing various ISO levels in your specific environment can help you understand the best balance between exposure and noise for your camera and subject.
By thoughtfully adjusting ISO in conjunction with aperture and shutter speed, you can capture well-exposed, detailed macro photos indoors, even in challenging light conditions. The key is to find the highest ISO that yields an adequately bright image with the least noticeable noise, tailored to your camera’s strengths and the specific lighting conditions you’re working with.
Optimal ISO Values for Different Indoor Lighting Conditions
Here are the optimal ISO values for different indoor lighting conditions.
Very Low Light Environments (e.g., dimly lit rooms, night scenes)
ISO range of 1600 – 6400 is perfect for very low light environments. In these settings, you need a higher ISO to compensate for the lack of light. However, the higher you go, the more noise will be introduced. Start at the lower end of this range and increase as needed. Modern cameras, especially full-frame models, can often handle this range well, maintaining a balance between exposure and acceptable noise levels.
Moderately Low Light (e.g., shaded areas, rooms with ambient lighting)
ISO range of 800 – 1600 is ideal for moderately low indoor light. This range is often sufficient to achieve good exposure without introducing significant noise. Cameras with larger sensors (like DSLRs and mirrorless cameras) are particularly adept at handling these ISO levels with minimal noise.
Well-Lit Indoor Conditions (e.g., brightly lit rooms, near windows)
ISO range of 100 – 800 is enough for well-lit indoors. In well-lit indoor settings, you can often keep the ISO lower. Start at ISO 100 and only increase if necessary. The goal is to use the lowest ISO that still allows you to capture a well-exposed image without compromising shutter speed or aperture settings that are critical for your depth of field and motion capture.
Using Artificial Lighting (e.g., with studio lights, flash)
ISO range of 100 – 400 is perfect when you are using artificial light. When you have control over the lighting, such as using external flashes or continuous lights, you can often keep the ISO at the lower end. This is ideal for maximizing image quality with minimal noise.
ISO Values for Specific Effects
The following are the best ISO values if you want to add special effects to your photos.
High-Key Photography (Bright, Low-Contrast Images)
ISO range of 400 – 800 for bright or low contrast images. This slightly elevated ISO helps achieve a brighter exposure typical of high-key images, even in indoor settings. Be cautious of overexposure in well-lit areas.
Low-Key Photography (Dark, High-Contrast Images)
You need an ISO range of 100 – 400 for high contrast or darker images. Keeping the ISO low helps maintain the dark, moody quality of low-key images while controlling noise, which is more visible in darker areas.
Grainy, Artistic Shots
ISO range of 3200 – 6400 or higher will give you a grainy look. For a deliberate grainy look, a high ISO can be used creatively. This works well for artistic or vintage-style shots where noise/grain adds to the mood.
In indoor macro photography, the optimal ISO setting will depend on both the lighting conditions and the artistic intent of the photograph. It’s essential to balance the need for a well-exposed image with the desire to minimize noise, and this balance can vary based on the capabilities of your camera and the specifics of the shooting environment. Regular experimentation and familiarity with your camera’s performance at various ISO levels are key to finding the right settings for your particular situation.
How to Use Focus for Indoor Macro Photography?
In photography, focus refers to the point or area in the image that is sharply defined. Proper focus is essential for ensuring that the subject or specific part of the subject is clearly and crisply represented in the photograph.
Depth of Field (Depth of Field)
Focus is closely related to depth of field, which is the range within the image that appears acceptably sharp. A shallow Depth of Field means only a small portion of the image, typically around the focus point, is in sharp focus, while a deep Depth of Field results in more of the image being in focus.
Role in Image Quality
Achieving good focus is crucial for capturing the intricate details in macro photography. Since macro photography often magnifies the subject significantly, any focus errors can be greatly amplified, making parts of the subject that should be sharp appear blurry.
Challenges and Importance of Focus in Macro Photography
Magnification Amplifies Focus Issues
In macro photography, the high magnification means that any slight error in focus can significantly impact the final image. The focus needs to be extremely precise to ensure that the intended part of the subject is rendered sharply.
Shallow Depth of Field
Due to the close distances involved in macro photography, the depth of field (Depth of Field) is inherently shallow, even when using small apertures. This shallow Depth of Field means that only a small portion of the image will be in sharp focus at any time, making the accurate placement of the focus point crucial.
Techniques for Achieving Sharp Focus
Here are the best techniques to use sharp focus while taking indoor macro shots.
Steady Camera Setup:
Using a tripod is vital to keep the camera steady. Any movement can shift the focus point, especially with the narrow Depth of Field in macro work. A stable platform is essential for maintaining the focus where it’s intended.
Live View for Precision:
Many macro photographers use the live view feature on their digital cameras, as it allows for precise focusing. Zooming in on the live view screen helps in getting the focus exactly right, especially for manual focusing.
Careful Composition:
Since re-framing after focusing can shift the focus plane, it’s important to compose your shot as accurately as possible before focusing. For handheld shots, some photographers use techniques like moving their body slightly forward or backward to fine-tune focus instead of adjusting the focus ring.
Focus Bracketing:
For static subjects, taking several shots at different focus points and then selecting the sharpest one can be an effective strategy. This is especially useful in situations where achieving perfect focus is challenging due to lighting or the subject’s nature.
How to Use Manual Focus for Indoor Photography?
Expert photographers normally rely on manual focus for taking breathtaking manual shots. The following lines explain how the beginner photographs follow suit.
Greater Control
Manual focus allows for greater precision, which is often required in macro photography. Since autofocus systems can sometimes struggle with small or low-contrast subjects typically found in macro work, manually adjusting the focus ensures that the most important part of the subject is in sharp focus.
Use of Magnification
Most digital cameras offer a magnification feature in live view mode, which is incredibly useful for manual focusing. By zooming in on the intended focus area on the screen, you can adjust the focus with high precision.
Setting Up for Manual Focus for Indoor Photography
Stabilize the Camera
Use a tripod to ensure your camera remains stable. This is crucial in macro photography, where even slight movements can throw your subject out of focus.
Utilize Live View
Switch to your camera’s live view mode. This mode displays a live image directly from the sensor, allowing you to see exactly what the camera will capture.
Focusing Techniques for Indoor Macro Images
Zoom in on Live View
Many cameras allow you to digitally zoom in on a specific area of the live view image. Use this feature to magnify the part of the subject where you want the focus to be sharpest.
Fine-Tune the Focus
Slowly adjust the focus ring on your lens until the desired area appears sharp on the screen. Take your time with this; in macro photography, even a millimeter can make a significant difference in focus.
Check and Recheck
After adjusting the focus, zoom out to view the entire frame to ensure the composition is still as desired. If necessary, readjust the focus.
How to Use Autofocus for Indoor Marco Photography?
Autofocus can be effective in situations where the subject has enough contrast for the camera to lock onto. Some modern cameras come with highly advanced autofocus systems that are capable of precise focusing even in macro scenarios.
In macro photography, autofocus may not always reliably focus on the desired part of the subject, especially if it’s small or lacks contrast. Additionally, in indoor settings with limited light, autofocus systems may struggle to perform optimally.
Autofocus can also struggle in macro photography due to the shallow depth of field and the small size of subjects. It might have difficulty locking onto the right part of a subject or be confused by background elements.
However, autofocus can still play a major role in macro photography if you know how to use it effectively, as explained by the following headings.
Selective Focus Points
Use your camera’s selective focus point setting to choose the exact point where you want the camera to focus. This helps in directing the autofocus system to the area of interest.
Focus and Recompose
In some cases, you can focus on a part of the subject that has a similar distance from the camera as your intended focus point, lock the focus, and then recompose your shot.
Aid with Lighting
Ensure there is enough light for your camera’s autofocus system to work effectively. Autofocus generally performs better in well-lit conditions.
How to Use Focus Stacking for Indoor Macro Photography?
Focus stacking involves taking multiple photos with different focus points and then combining them in post-processing to create an image with greater depth of field than what is possible with a single shot.
This technique also requires specific software that blends these images, keeping the sharpest parts of each to create an image where more of the subject is in focus. It’s particularly useful for subjects like insects, flowers, or intricate objects where you want front-to-back sharpness.
Focus stacking involves taking a series of photos at varying focus distances and then combining these images in post-processing to create a single image with a greater depth of field than any of the individual shots.
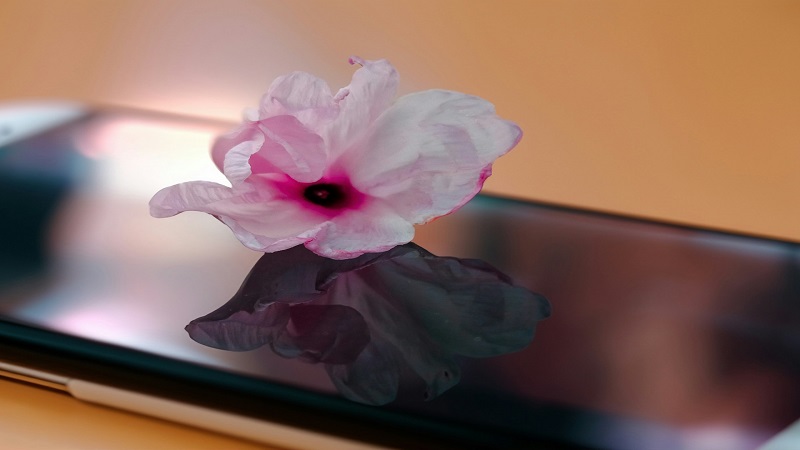
The following image may seem like a single image but it is the result of six different images taken at different focal lengths and then focus stacked in photoshop.
Tips to Effectively Use Photo Stacking
Using photo stacking for indoor photos or macro images should not be difficult provided you know the right techniques.
Stable Setup
Use a tripod to ensure that your camera does not move between shots. Camera shakes can easily ruin the photos, especially when you are taking photos in quick succession.
Consistent Exposure
Set your camera to manual mode to maintain consistent exposure across all shots. Use manual or aperture priority mode to ensure the aperture remains constant.
Shooting the Stack
Start by focusing on the nearest part of the subject and take a photo. Then, slightly adjust the focus to a point further back and take another shot. Repeat this process, moving the focus point back each time, until you’ve covered the entire subject.
Post-Processing
Use software like Adobe Photoshop, Helicon Focus, or Zerene Stacker to blend these images into one composite photo. These programs align the images and blend them to keep the sharp areas from each shot, creating an image with an extended depth of field.
Using these techniques effectively in indoor macro photography will significantly improve your focus accuracy, leading to sharper and more detailed images. Each method has its own strengths and is suited to different aspects of macro photography. Manual focus offers unmatched precision, autofocus provides speed and convenience, and focus stacking delivers an extended depth of field impossible to achieve in a single shot.
How to Use White Balance for Indoor Photography?
White balance (WB) in photography is the process of removing unrealistic color casts so that objects that appear white in person are rendered white in your photo. It’s a critical setting because it affects the overall color tone of your images.
White balance is largely about balancing the color temperature of your photos. Color temperature is measured in Kelvin (K) and ranges from cool (blue tones) to warm (yellow tones). Different light sources emit light at different color temperatures, and the white balance setting compensates for these variations.
Adjusting White Balance for Accurate Colors
Matching White Balance to Light Source:
The goal is to adjust the white balance setting so that it matches the color temperature of the light source. This adjustment neutralizes color casts from that light source, making whites appear white and ensuring other colors are accurate.
Tools for Adjustment:
Many cameras offer white balance presets for common lighting situations (like sunlight, shade, tungsten, and fluorescent), a custom setting, and an auto white balance (AWB) option.
Using Preset White Balance Modes
Sunlight, Cloudy, Shade Presets
These are designed for outdoor lighting and are generally not used in indoor macro photography unless you’re working near a window with natural light.
Tungsten/Incandescent Preset
This preset compensates for the warm, yellowish color cast of indoor tungsten lighting, common in household light bulbs.
Fluorescent Preset
Use this to correct the cool, sometimes greenish cast of fluorescent lights often found in indoor settings.
Custom White Balance for Precise Control
Photographing a White or Neutral Grey Card:
To set a custom white balance, photograph a white or neutral grey card under the same lighting conditions as your subject. The card should fill the frame and be properly exposed.
Using the Reference Image:
Access your camera’s white balance settings and select the option to set a custom white balance. Use the reference image of the white or grey card to calibrate the white balance.
Consistency in Lighting:
Ensure that the lighting conditions don’t change after setting the custom white balance. If the lighting changes, you’ll need to recalibrate.
Auto White Balance for Convenience
Ease of Use
Auto white balance is convenient and works by automatically adjusting the white balance to neutralize the dominant color cast in the image. It’s useful when shooting in mixed lighting or when lighting conditions are changing.
Potential Inconsistencies
While auto white balance can be effective, it may not always provide the most accurate results, especially in challenging lighting conditions. It can sometimes struggle to correctly interpret the scene, leading to inconsistent color tones across a series of images.
Additional Tips for White Balance in Indoor Macro Photography
Consistent Lighting for Series
When shooting a series of images, consistency in white balance is key. Using preset or custom white balance settings can ensure a uniform look across your photos.
Post-Processing Adjustments
Shooting in RAW format allows for greater flexibility in adjusting white balance during post-processing, as you can fine-tune the setting without any loss of image quality.
Experimentation
Don’t hesitate to experiment with different white balance settings to see how they affect the mood and feel of your images. Sometimes, deviating from the ‘correct’ white balance can yield artistically pleasing results.
Adjusting the white balance is a fundamental aspect of capturing accurate and appealing colors in your macro photography, especially indoors where artificial lighting can introduce various color casts. Understanding and effectively using the different white balance settings can significantly enhance the
Creative Indoor Macro Photography Ideas
Finally, we come to some of the most creative indoor macro photography ideas. You can implement all of the above tips while utilizing these ideas.
Explore the Unseen World of Rocks and Minerals
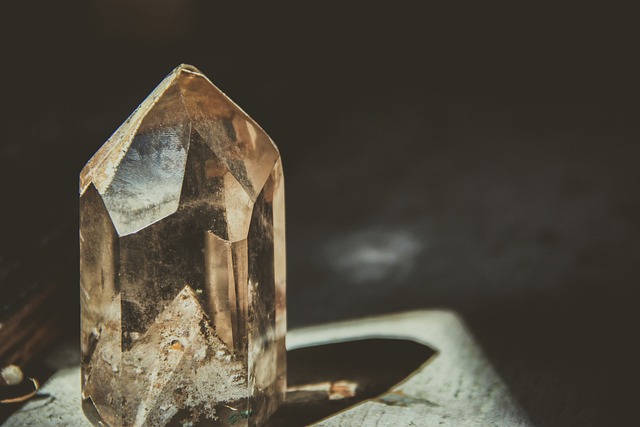
One of the first indoor macro photography tips is to delve into the miniature landscapes of various stones. From the smooth, polished surfaces of river rocks to the sharp, crystalline structures of quartz, each stone holds a universe of details.
Arrange these geological wonders to highlight contrasts – smooth versus rough, opaque versus translucent. A single stone, filling the frame, can unveil a world of intricate patterns and subtle color variations.
Side lighting is your ally here. It casts shadows and creates depth, making textures almost tactile. Natural light from a window can bring out the subtle color play in minerals.
Aim to transform ordinary pebbles into monumental landscapes. It’s not just a stone – it’s a mountain range in miniature, a frozen sea, a silent story waiting to be told.
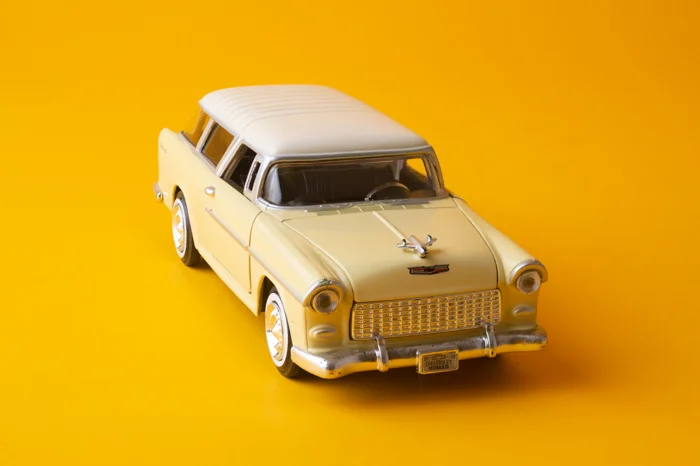
Craft Stories with Lego Blocks
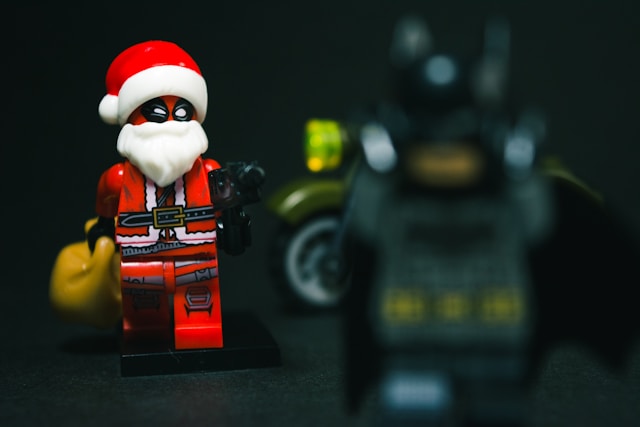
Lego blocks and figures aren’t just toys; they’re the building blocks of tiny universes. Create scenes that tell a story – a bustling Lego city street, a serene countryside, or even a scene from your favorite movie.
Get down on their level. Shooting from a Lego figure’s perspective transforms how we perceive these plastic scenes. Play with depth of field to blur out the ‘real world,’ immersing your viewer entirely in the Lego universe.
Legos are vibrant and colorful, so let them shine. Use diffused, bright light to avoid harsh shadows and keep the colors true and vivid.
Your goal is to instill a sense of wonder and playfulness. Make the viewer shrink down and wander through this Lego landscape, discovering the joy and creativity of a child’s imagination.
Explore the Beauty of Fruits and Vegetables
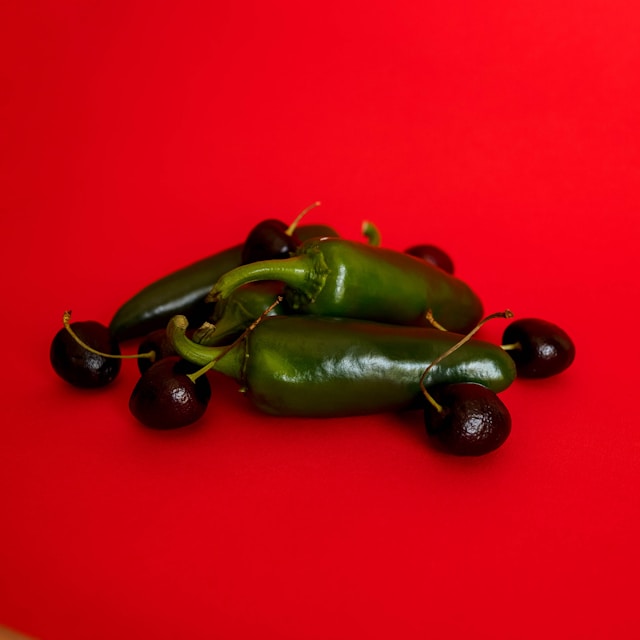
Explore the overlooked beauty of fruits and vegetables. A cross-section of a kiwi, the inner chambers of a bell pepper, or the intricate seeds of a pomegranate – each offers a unique visual experience.
Focus on the points where different textures and colors converge. Use macro to transform these everyday items into abstract art. The symmetrical patterns in a slice of citrus, or the chaotic beauty of a halved passion fruit, can be mesmerizing.
Soft, natural light accentuates the translucency of fruit slices and the vibrant colors of vegetables. Backlighting can create a luminous effect, highlighting the delicate textures and patterns.
Your aim is to showcase the elegance and complexity of the simple things we eat. It’s about reawakening a sense of wonder and appreciation for the natural beauty in our daily lives.
Capture the Beauty of Time and Neglect

Focus on surfaces where paint is peeling – an old door, a forgotten piece of furniture, a neglected wall. These are canvases where time has painted its own masterpiece.
Zoom in on areas where the texture is most pronounced. The interplay of peeling layers, revealing bursts of underlying color, creates a rich tapestry of history and decay.
Use light to accentuate texture. Raking light (light hitting the surface at an angle) can exaggerate the sense of decay, deepening the grooves and highlighting the flakes.
Aim to convey a story of time, memory, and beauty in abandonment. It’s about finding poetry in decay, a visual ode to the impermanence of all things.
Unveil the Grace of Avian Plumage
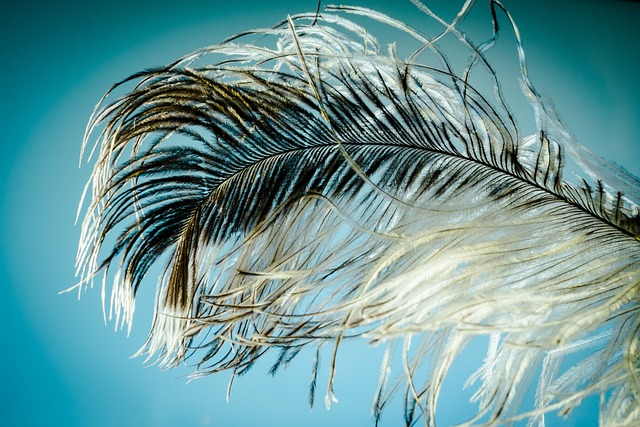
Feathers, with their intricate patterns and vibrant colors, are nature’s masterpieces. Each feather, whether from a common backyard bird or an exotic species, carries a unique design – delicate barbs, subtle color gradients, and fine textures.
Isolate a single feather against a contrasting background or arrange multiple feathers to form a tapestry of textures and hues. Close-ups can reveal the feather’s microstructure, turning it into an abstract piece of art.
Backlighting can dramatically highlight the feather’s translucency and colors. Soft, diffused light can reduce harsh shadows while emphasizing the delicate details.
The objective is to capture the elegance and sophistication of these natural wonders, showcasing the perfection in every barb and strand.
The Artistry of Fabrics in Close-Up
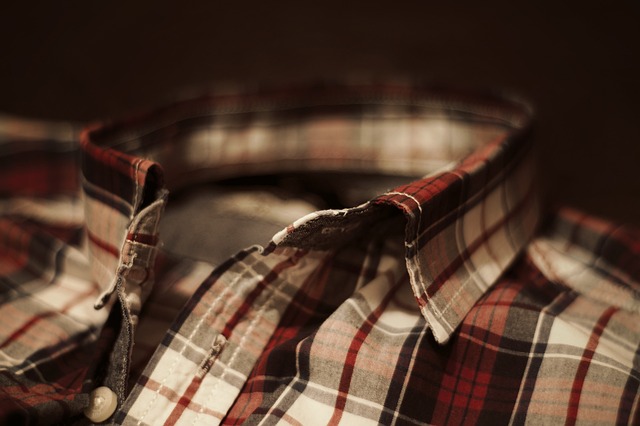
Textiles offer an endless variety of patterns, textures, and colors. From the weave of a linen napkin to the intricate patterns of a silk scarf, every fabric tells a story.
Experiment with draping and folding the cloth to create dynamic shapes and shadows. Focus on areas where light and shadow interplay or where the texture is most pronounced.
Side lighting can enhance the texture by creating shadows within the folds. Soft, diffused light helps in capturing the true colors and subtle patterns of the fabric.
Transform everyday textiles into landscapes of texture and color, inviting the viewer to feel the fabric’s texture through the image.
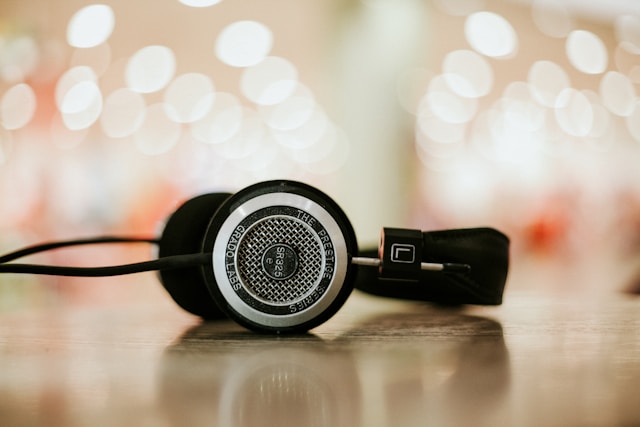
Zoom in on the Everyday Gadget
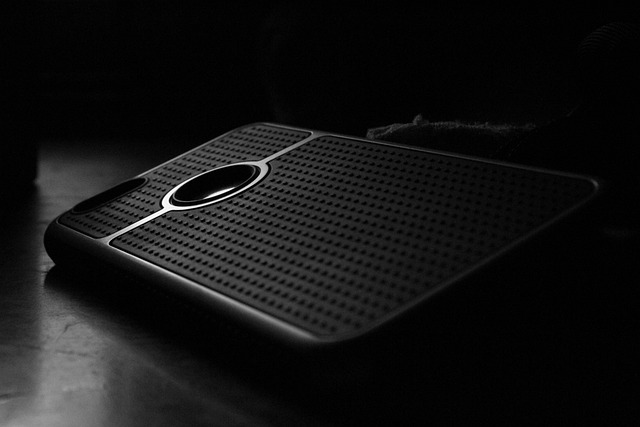
A TV remote, an item so mundane yet so intricate when seen up close. The buttons, symbols, and even the wear and tear it undergoes offer an interesting photographic subject.
Focus on the patterns made by the buttons or zoom in on specific symbols. Contrast the smooth areas with the textured parts of the remote.
Use a mix of direct and indirect lighting to create depth and highlight the textures of the buttons and surface. The play of light and shadow can add a dramatic effect.
This idea is about finding beauty and interest in the most ordinary objects. It’s turning the everyday into something intriguing, inviting the viewer to see the overlooked details in their daily surroundings.
Capture the Sparkle and Intricacy of Jewelry
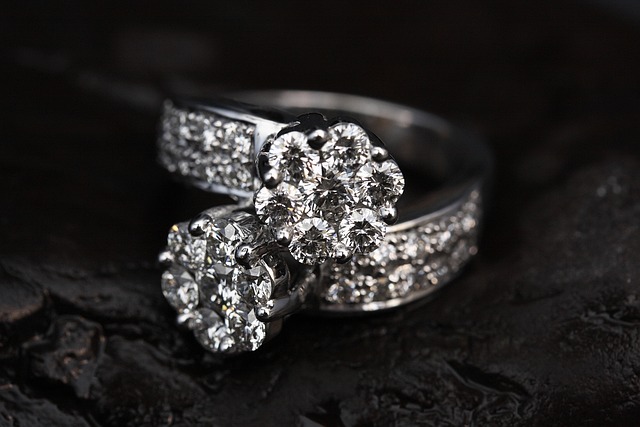
One of the best indoor macro photography tips is to take pictures of Jewelry pieces. Anything from the intricate patterns of a necklace to the facets of a gemstone, are perfect for showcasing fine details and craftsmanship.
Focus on a single piece of jewelry, like a ring or earring, highlighting the textures, patterns, or gemstones. Arrange them against a contrasting background or use the natural form of the jewelry to guide your composition.
Utilize soft, diffused lighting to bring out the sparkle without overwhelming glare. Reflective surfaces can be challenging, so experiment with angles to capture the light just right.
The goal is to emphasize the elegance and detail of the jewelry, transforming these small adornments into captivating subjects that tell a story of beauty and artistry.
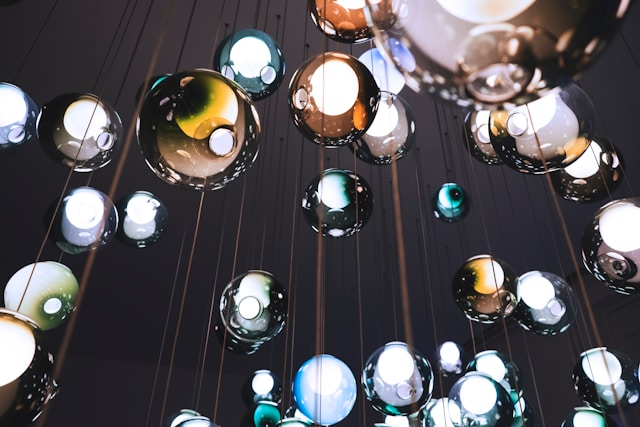
Explore the Reflective Beauty of Water
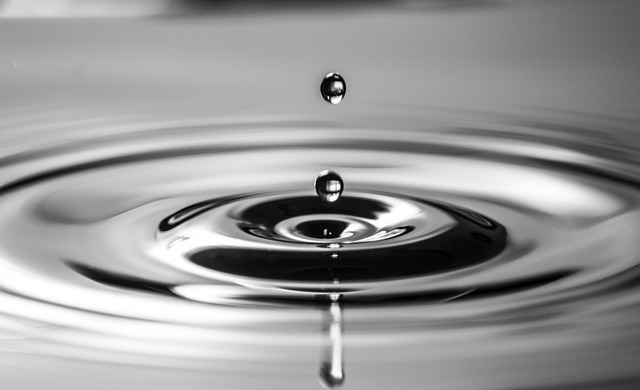
Water droplets, whether on a leaf, glass, or any smooth surface, offer a unique view of the world. Each droplet can act like a tiny lens, reflecting and distorting its surroundings.
Capture the droplets so that they reflect an interesting scene or object. You can also focus on the droplet’s shape and the way it interacts with the surface it’s on.
Backlighting can illuminate the droplet from behind, making it glow, while side lighting can enhance its shape and texture. Avoid direct harsh light to prevent overexposure.
Aim to transform simple water droplets into mesmerizing orbs of light and color, each containing a tiny, inverted world within.
Babies or Toddlers: Capturing Innocence

Babies and toddlers, with their delicate features and expressions, make for heartwarmingly intimate macro photography subjects. Focus on capturing the small, often overlooked details – the curl of a tiny fist, the soft swirl of hair, the tiny toes, or the innocent gaze.
Gently direct your focus to highlight the innocence and delicate details of a baby or toddler. This could be a close-up of their hands, feet, eyes, or even the fine baby hairs on their skin. Ensure the composition is safe and comfortable for the child.
Soft, natural light is ideal for photographing babies and toddlers. It’s gentle on their sensitive eyes and perfectly captures the softness of their skin. A window with diffused light can create a serene, angelic quality.
The aim is to capture the purity and delicate beauty of early childhood. Each image should evoke a sense of wonder and tenderness, reflecting the fleeting, precious moments of youth.
These ideas for indoor macro photography not only provide a way to explore the unseen beauty of small and everyday items but also offer a canvas for creative storytelling and artistic expression. Each theme allows you to delve deeper, exploring textures, colors, and forms in a way that transforms the mundane into the extraordinary.
Also Read: How To Take Landscape Photos: 25 Best Tips
Final Thoughts
The world of indoor macro photography opens up endless possibilities for creative exploration, even within the confines of your home. We’ve delved into the significance of choosing the right equipment – a capable camera, a dedicated macro lens, a stable tripod, and a remote shutter release – all crucial for capturing those minute, detailed images. The importance of mastering camera settings cannot be overstated; understanding and manipulating aperture, shutter speed, ISO, focus, and white balance are key to transforming ordinary subjects into extraordinary macro photography masterpieces. From the intricate textures of stones and the playful scenes of Lego blocks to the delicate details of a baby’s features, each idea presents an opportunity to explore and capture the unseen beauty of everyday objects.
I encourage you to embark on this journey of indoor macro photography, experimenting with the various indoor macro photography tips shared. Whether you’re a seasoned photographer or just starting, there’s always something new to discover and capture in the macro world. And when you do, don’t hesitate to share your results and experiences. Your feedback, whether in the comments section or on social media, is not just a sharing of images but an exchange of inspiration and creativity within the photography community. So, grab your camera, let your imagination run wild, and let the small world around you reveal its big wonders